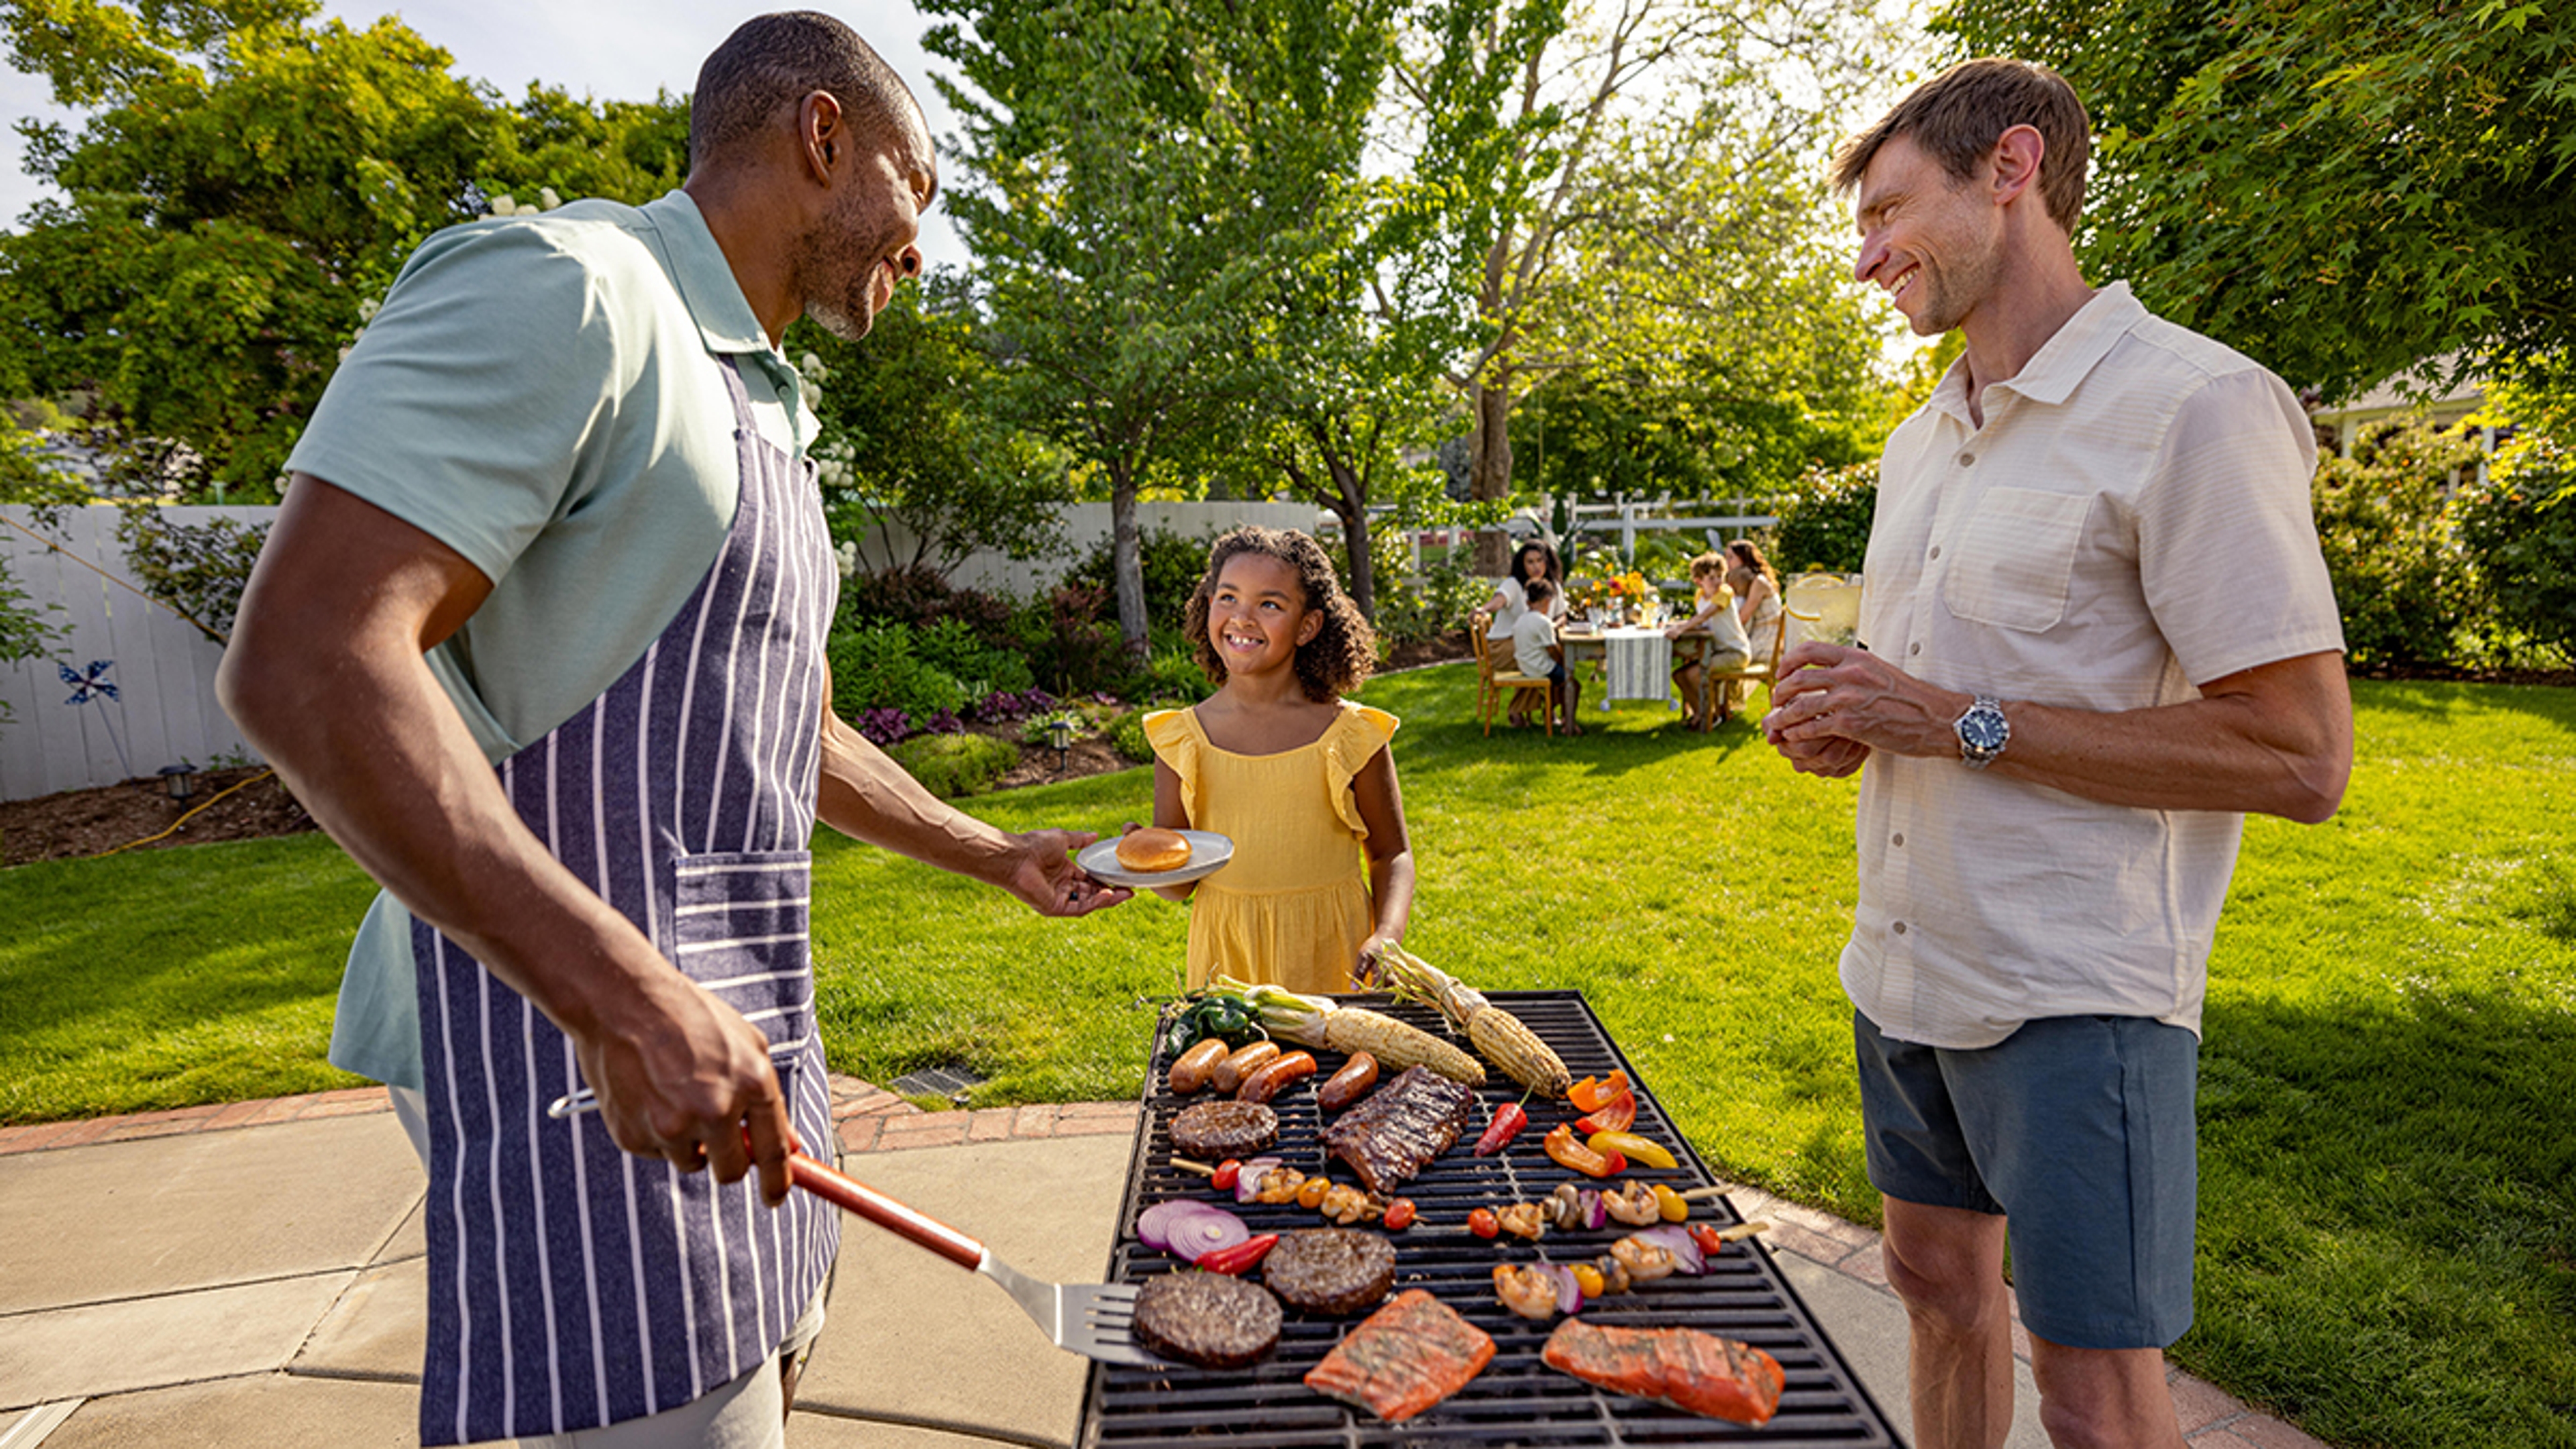
We love eating meat that's been cooked on a grill. It's practically a national pastime. But there are many types of foods other than animal proteins that you can grill.
First, let's clarify the difference between barbecuing and grilling. The two terms are often used interchangeably, and that's a mistake.
Barbecuing is a method of preparing food that is cooked long and at a low temperature over wood-fired smoke. It can only be done with fire and wood. It's the wood that makes it good...
Grilling is a method of using high- or low-heat cooking directly on a grill grate. It is usually done over charcoal or wood fire, but can also be done on a grill plate or cast-iron pan. Grilling can be done inside or outside, and the desired result is to achieve a char or grill mark that occurs when the food is cooked. This reaction, known as the Maillard reaction, changes the depth of flavor of the food being prepared.
Now that we've got that out of the way, let's talk about the different types of grills you find in backyards across America.
Type of grills

Barbecue grill
This is a barrel or smoking-style grill, where you load wood and cook indirectly over the wood heat and use the smoke to flavor the food. Most of these setups allow you to have a grill grate directly over the wood fire. It's more challenging to control the heat, but you get a much stronger smoky flavor
Charcoal fired grill
Kettle-shaped where you load charcoal, a charcoal-fired grill has a vent to control temperature and a lid to contain the heat and smoke. The drippings of the meat or fish cause smoke to come from the charcoal that seasons the meat as it cooks.
Gas grill
A gas grill can be used indoors or outdoors; the outdoor version tends to get a little higher cook temperature, thus offering more desirable results. Gas grills give you a nice char but lack the depth of flavor from cooking over wood or charcoal.
Grill pan
Grill pans can be cast-iron or non-stick and be heated on a home stove burner or an open fire. They offer even heat distribution and can easily manage small batches of food, including delicate foods, like fish, since the pan prevents it from falling through the grates.
READ MORE: Ultimate Grill Guide
How to grill meat
Meat is easily the most popular item to grill. That is largely due to the aforementioned Maillard reaction, the occurrence that causes the char and changes the flavor of the meat.
One general rule for grilling meat: You want the meat to be dry to get the best char and flavor profile when you cook it. There are two ways to achieve this: 1) resting in the refrigerator overnight, unwrapped and 2) salting the meat two to 36 hours before cooking it. This is known as a dry brine, and doing both will yield the most flavorful meat once you grill it.
I like to season the day before and let the meat sit unwrapped in the refrigerator for 24 hours. You can also add dry spices and herbs to the salt to create the flavor profile you like.
Ribeye
My favorite cut of beef, the ribeye is marbled and flavorful with a good amount of fat. When you grill it, the fat drips into the coals and creates an enticing aroma as it cooks.
The best approach with a ribeye is to season it with a generous amount of kosher salt and coarse ground pepper the night before. Get bone-in ribeye if you can, as the bone makes it more flavorful and retains more moisture when you cook it.
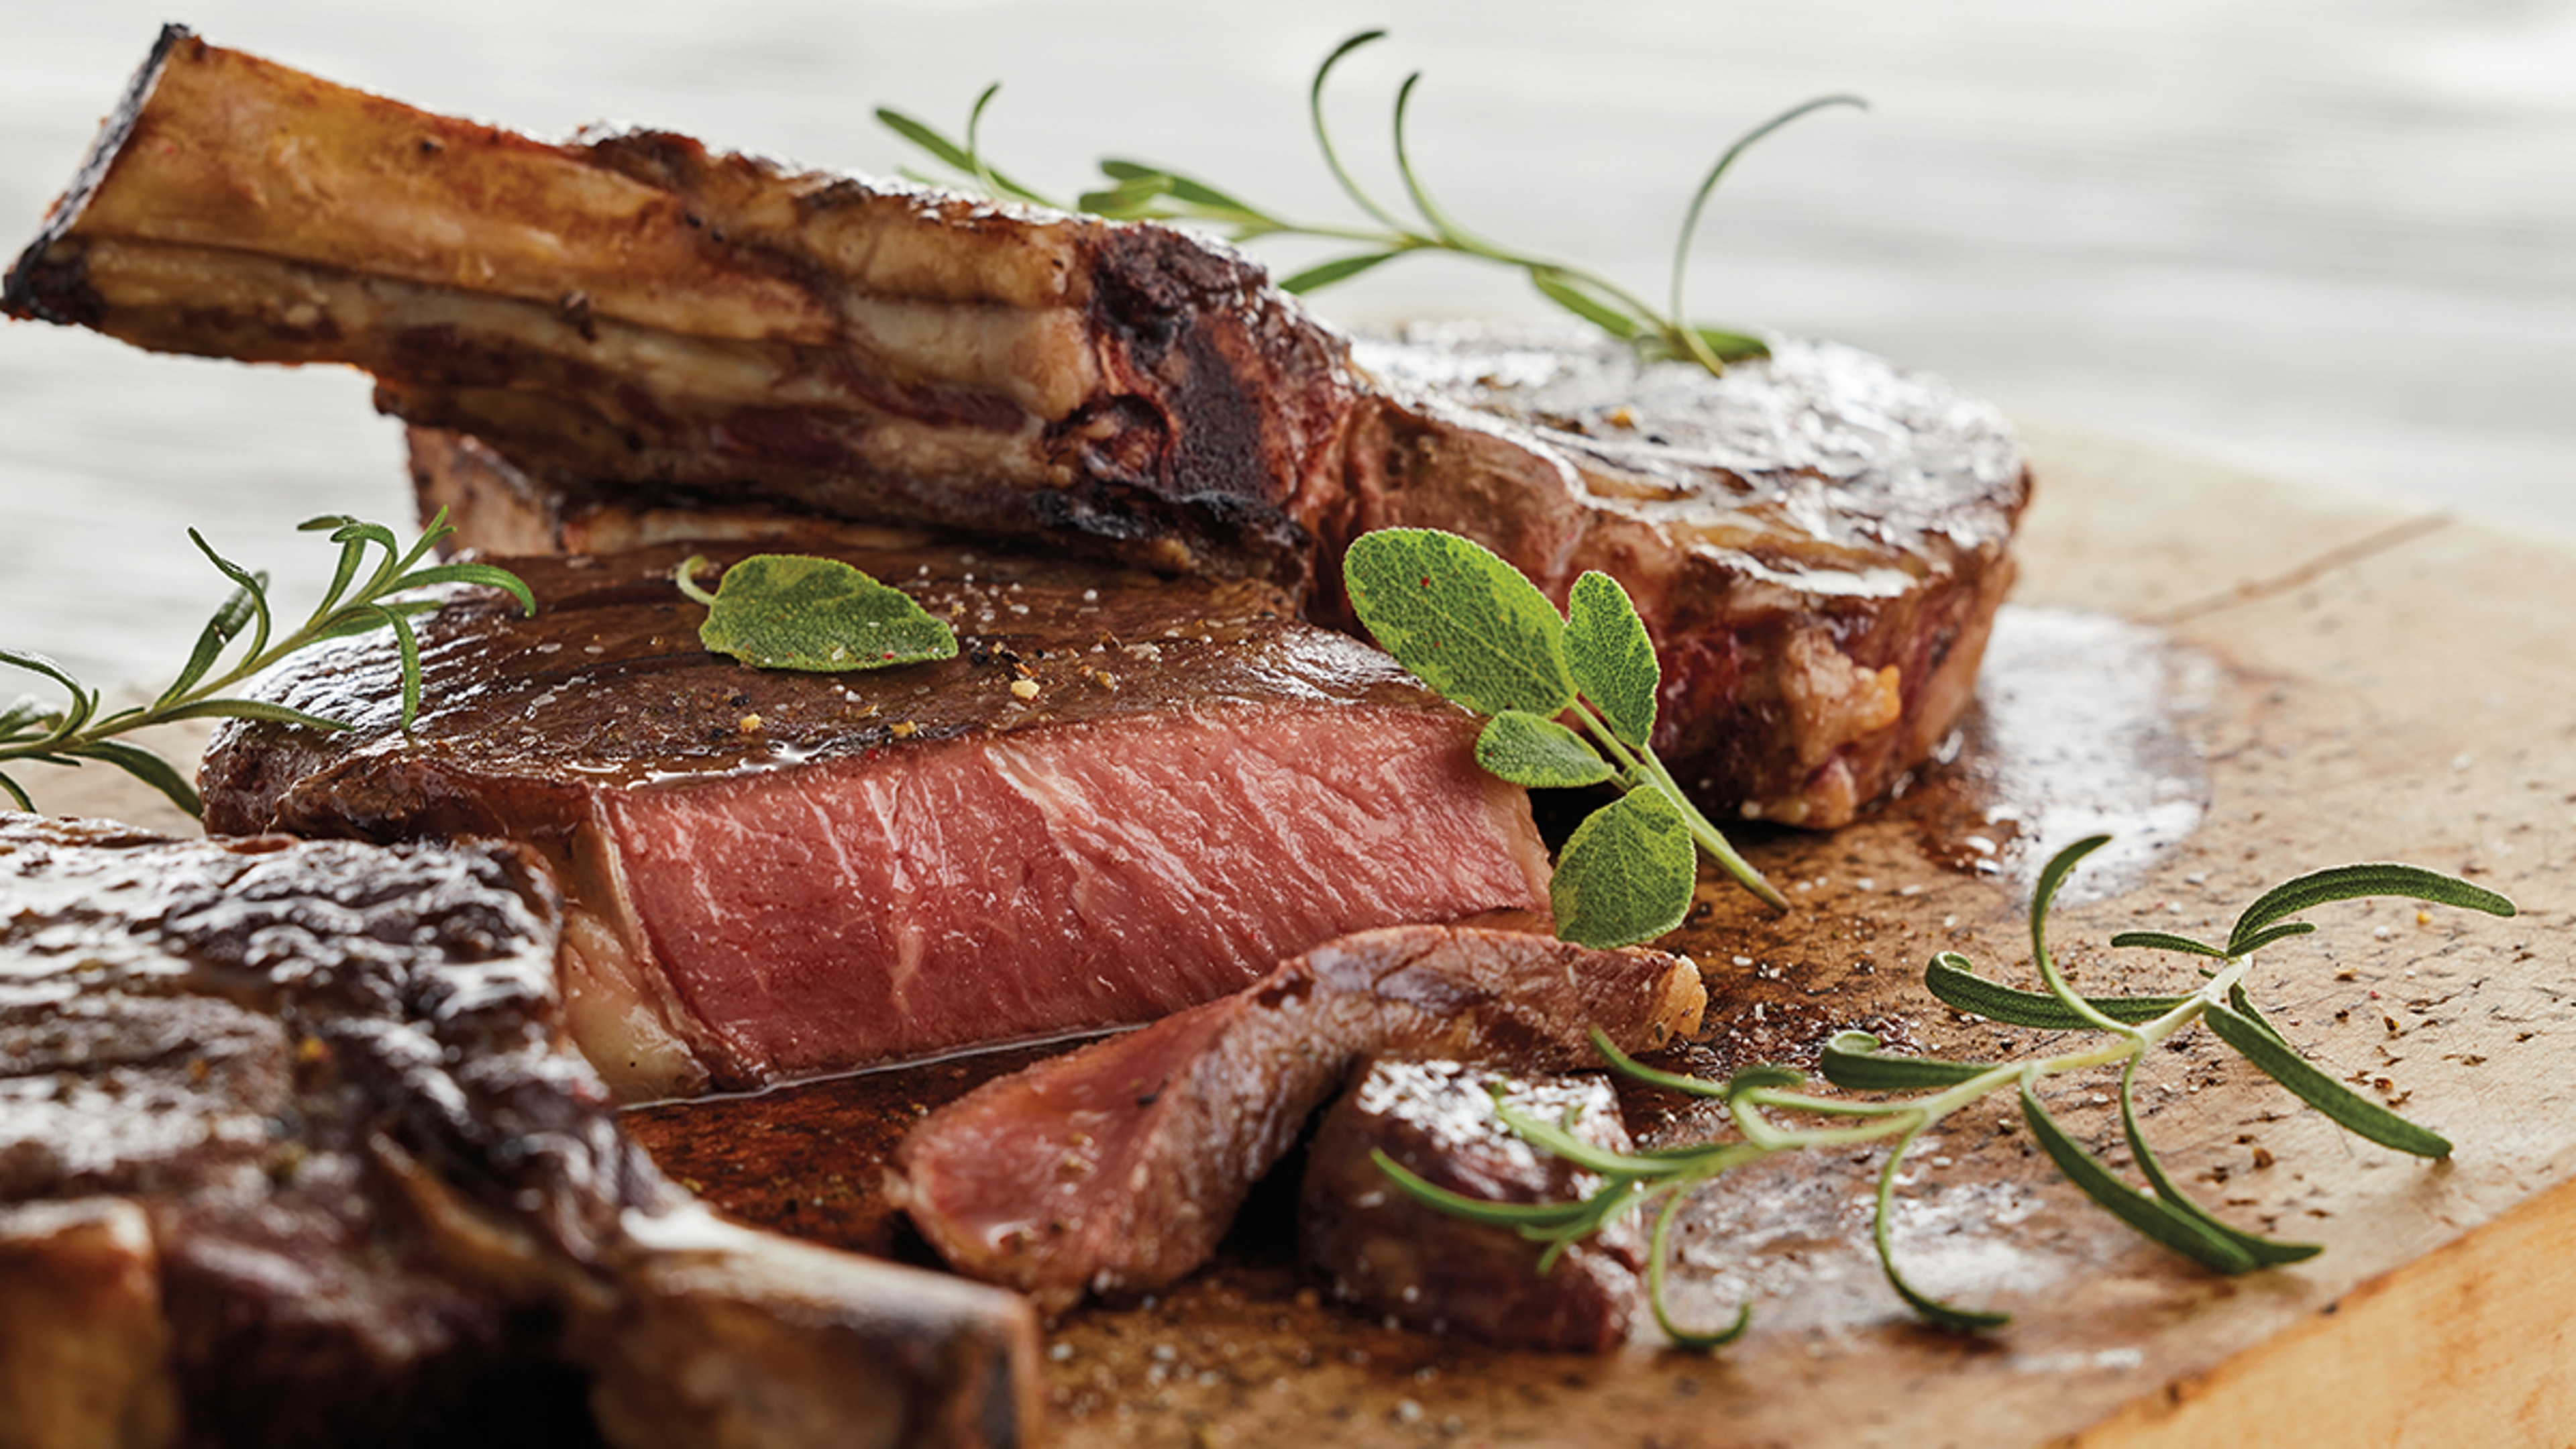
Heat the grill at a high temperature, then create a two-zone fire where you shift the coals all to one side of the grill so you have a high zone and a low zone. You should create this for everything that you grill. Sear the steak for two to three minutes on each side, rendering some of the exterior fat and creating nice grill marks. Next, move the steak to the low temperature side of the grill and away from the direct heat, and cover your grill. If you have a thermometer, the interior temperature of the grill now should be around 350° F. Let the steak cook for 15 minutes, then flip and cook another 15 minutes. Check the doneness with a probe thermometer — 120°-130° F for rare, 135°-145° F for medium (we're not even going to tell you the temperature for well done because that's blasphemy) — and remove from the grill to a board or plate.
Important: Allow the meat to rest with loose foil over it for 10 to 15 minutes before cutting to keep the juices in. You can brush it with a little herb oil or garlic butter while it's resting.
Chicken breast
This piece of poultry is always puzzling: How do you grill chicken breast without drying it out or overcooking it?
The best way to approach grilling chicken breast is to leave the skin on (it can be removed after cooking), leave the wing bone in (it can be removed after cooking), and wet brine the chicken (obviously cannot be done after cooking). Wet brine involves creating a liquid with a ratio of 2 quarts water or apple juice, 8 ounces of kosher salt, 3 ounces of sugar, and any herbs that you like. Submerge the chicken pieces for 12 to 18 hours in the solution, remove and drain well, and pat dry.
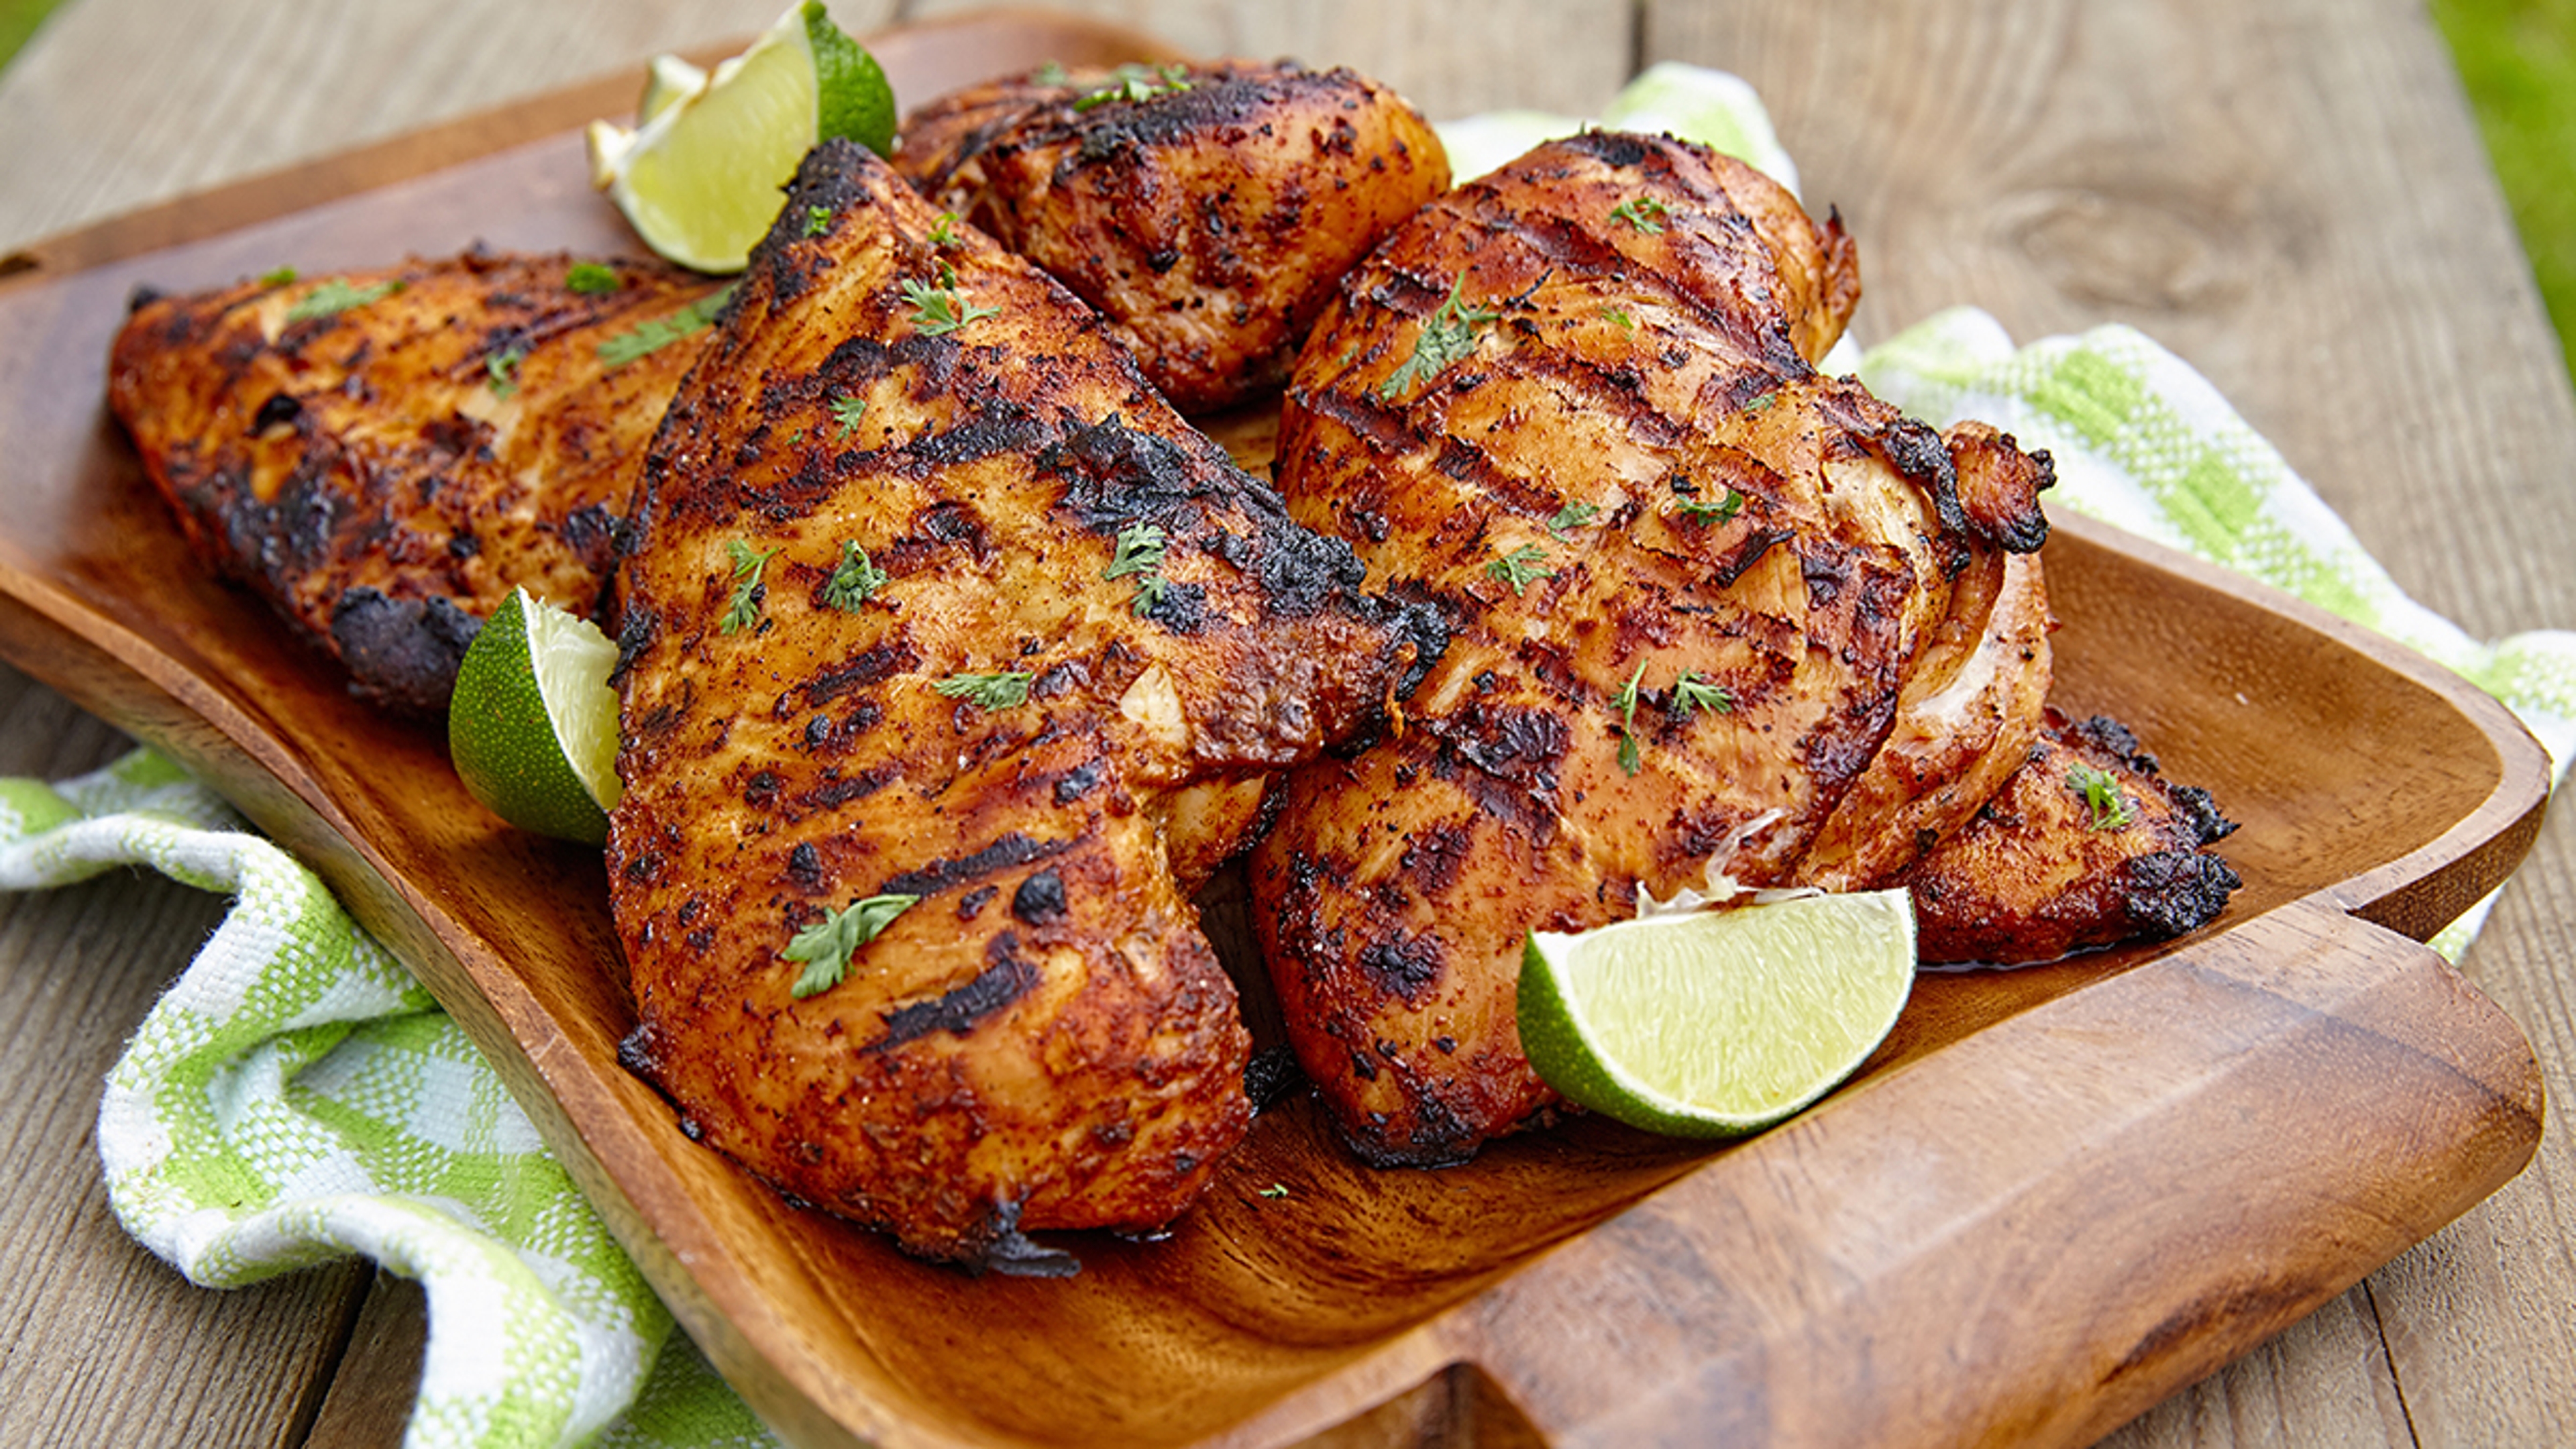
Brush the chicken with a little oil, and then put it over the medium-hot part of the grill for about two minutes, flip, and grill for two more minutes. Repeat once on each side.
Pull the chicken to the low heat part of the grill and take its temperature at the thickest part of the breast — it should register a minimum of 155° F. If it is at the proper temperature, remove and allow the meat to rest for five to 10 minutes, and then serve.
If you want to cook quicker or ensure the meat is cooked through, you can pound out the breasts like cutlets; this can cut your cooking time in half. Just be sure not to overcook the meat.
I also like to have a little marinade of citrus or vinegar (one-fourth cup), olive oil (three-fourths cup), and some fresh chopped herbs to brush on the cooked meat while it rests.
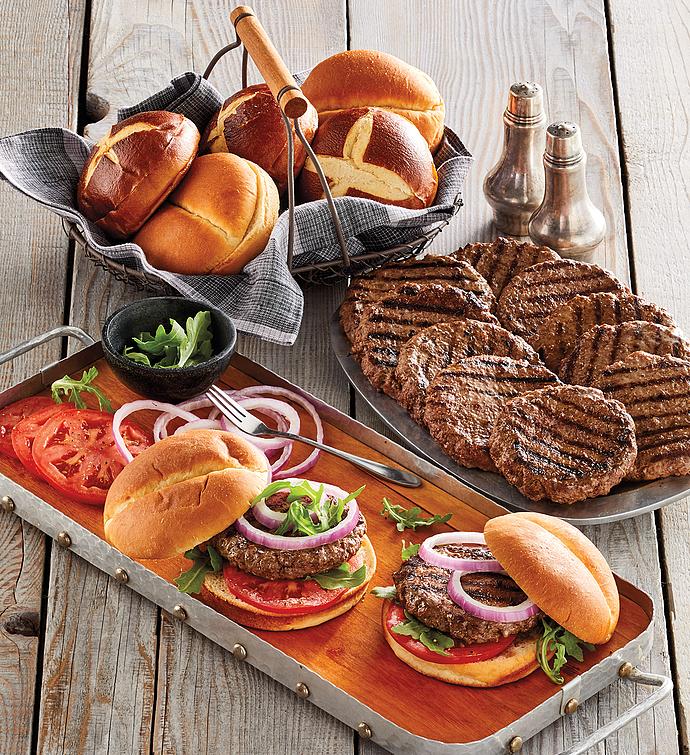
Wagyu burgers
When it comes to Wagyu burgers, I prefer using a grill pan. The meat is so fatty and the juices so delicious, I hate losing them to the coals. Sorry, coals, we'll feed you next time.
My strategy is to put a cast-iron grill pan on the charcoal grill to heat it up nicely. This way we can capture some of the smoke flavor and keep the mess outside when the burger is searing.
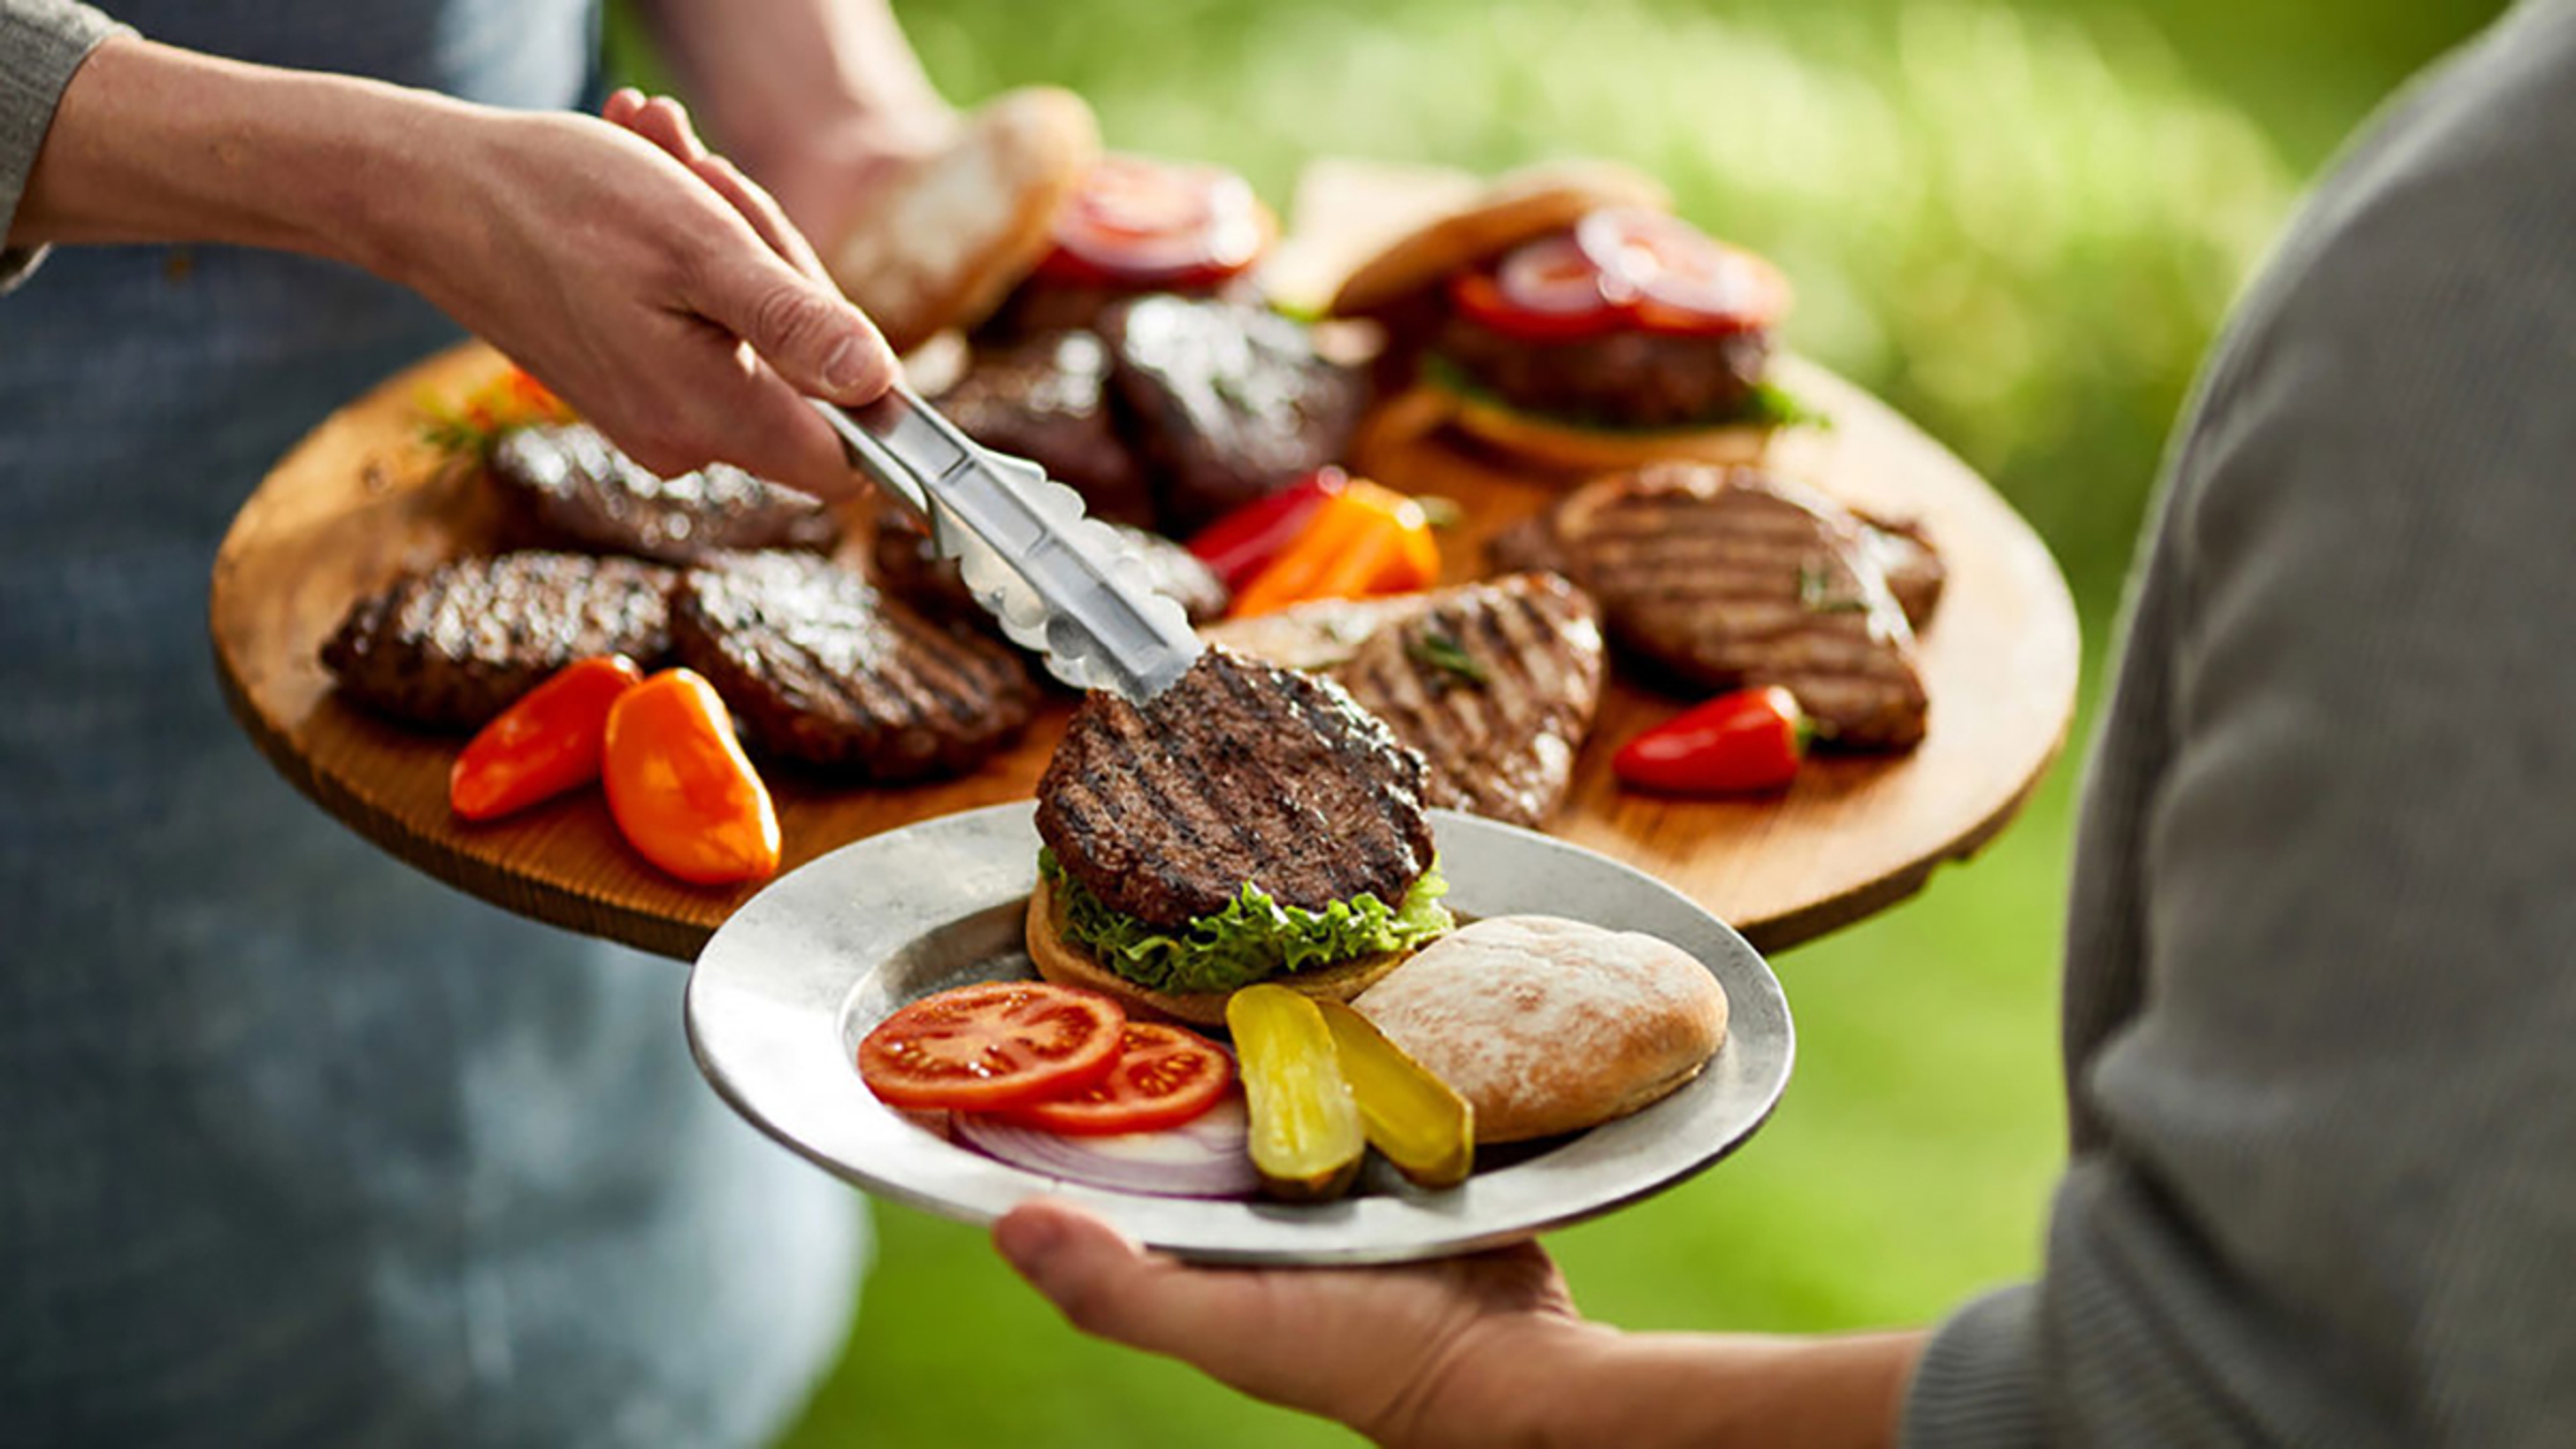
When using Wagyu, you want to make the burgers at least 5 to 6 ounces to retain the juiciness. Once the patties are formed (or if you buy pre-made patties), press a little dimple in the center of the burger to allow the meat to expand when it cooks without turning into a meatball. Generously season with kosher salt and coarse ground pepper, like you would a steak, and allow the meat to sit for an hour before cooking it.
When the pan is nice and hot, sear the burgers for 2 1/2 minutes per side, with the lid on (this will keep most of the heat in the grill to help cook the burgers). After cooking on each side, check the internal temperature — it's the same as the recommended temperature for the ribeye. You don't want to take the burgers past medium, as you will lose all the Wagyu flavor that you paid for. If the temperature is under 145° F, leave them on the grill for an additional two minutes and check the temperature again. Remember to let the burgers rest for at least five minutes after they're done cooking.
Tip: Put the cheese on the burgers while they are resting and watch it slowly melt.
Ribs
Baby back ribs turn out great on the grill, especially if you have the time to cook them low and slow. The only right way to do ribs on a grill is with wood — never with gas— but if that is not possible, you can use charcoal. If you are using wood, get yourself some fruit wood, such as apple or cherry, to impart a nice mellow smoke flavor and slight sweetness.
To prepare the ribs, peel the membrane off the back side of the ribs before seasoning them. This is best done with the tines of a fork, and it helps to use a paper towel to help grip the membrane.
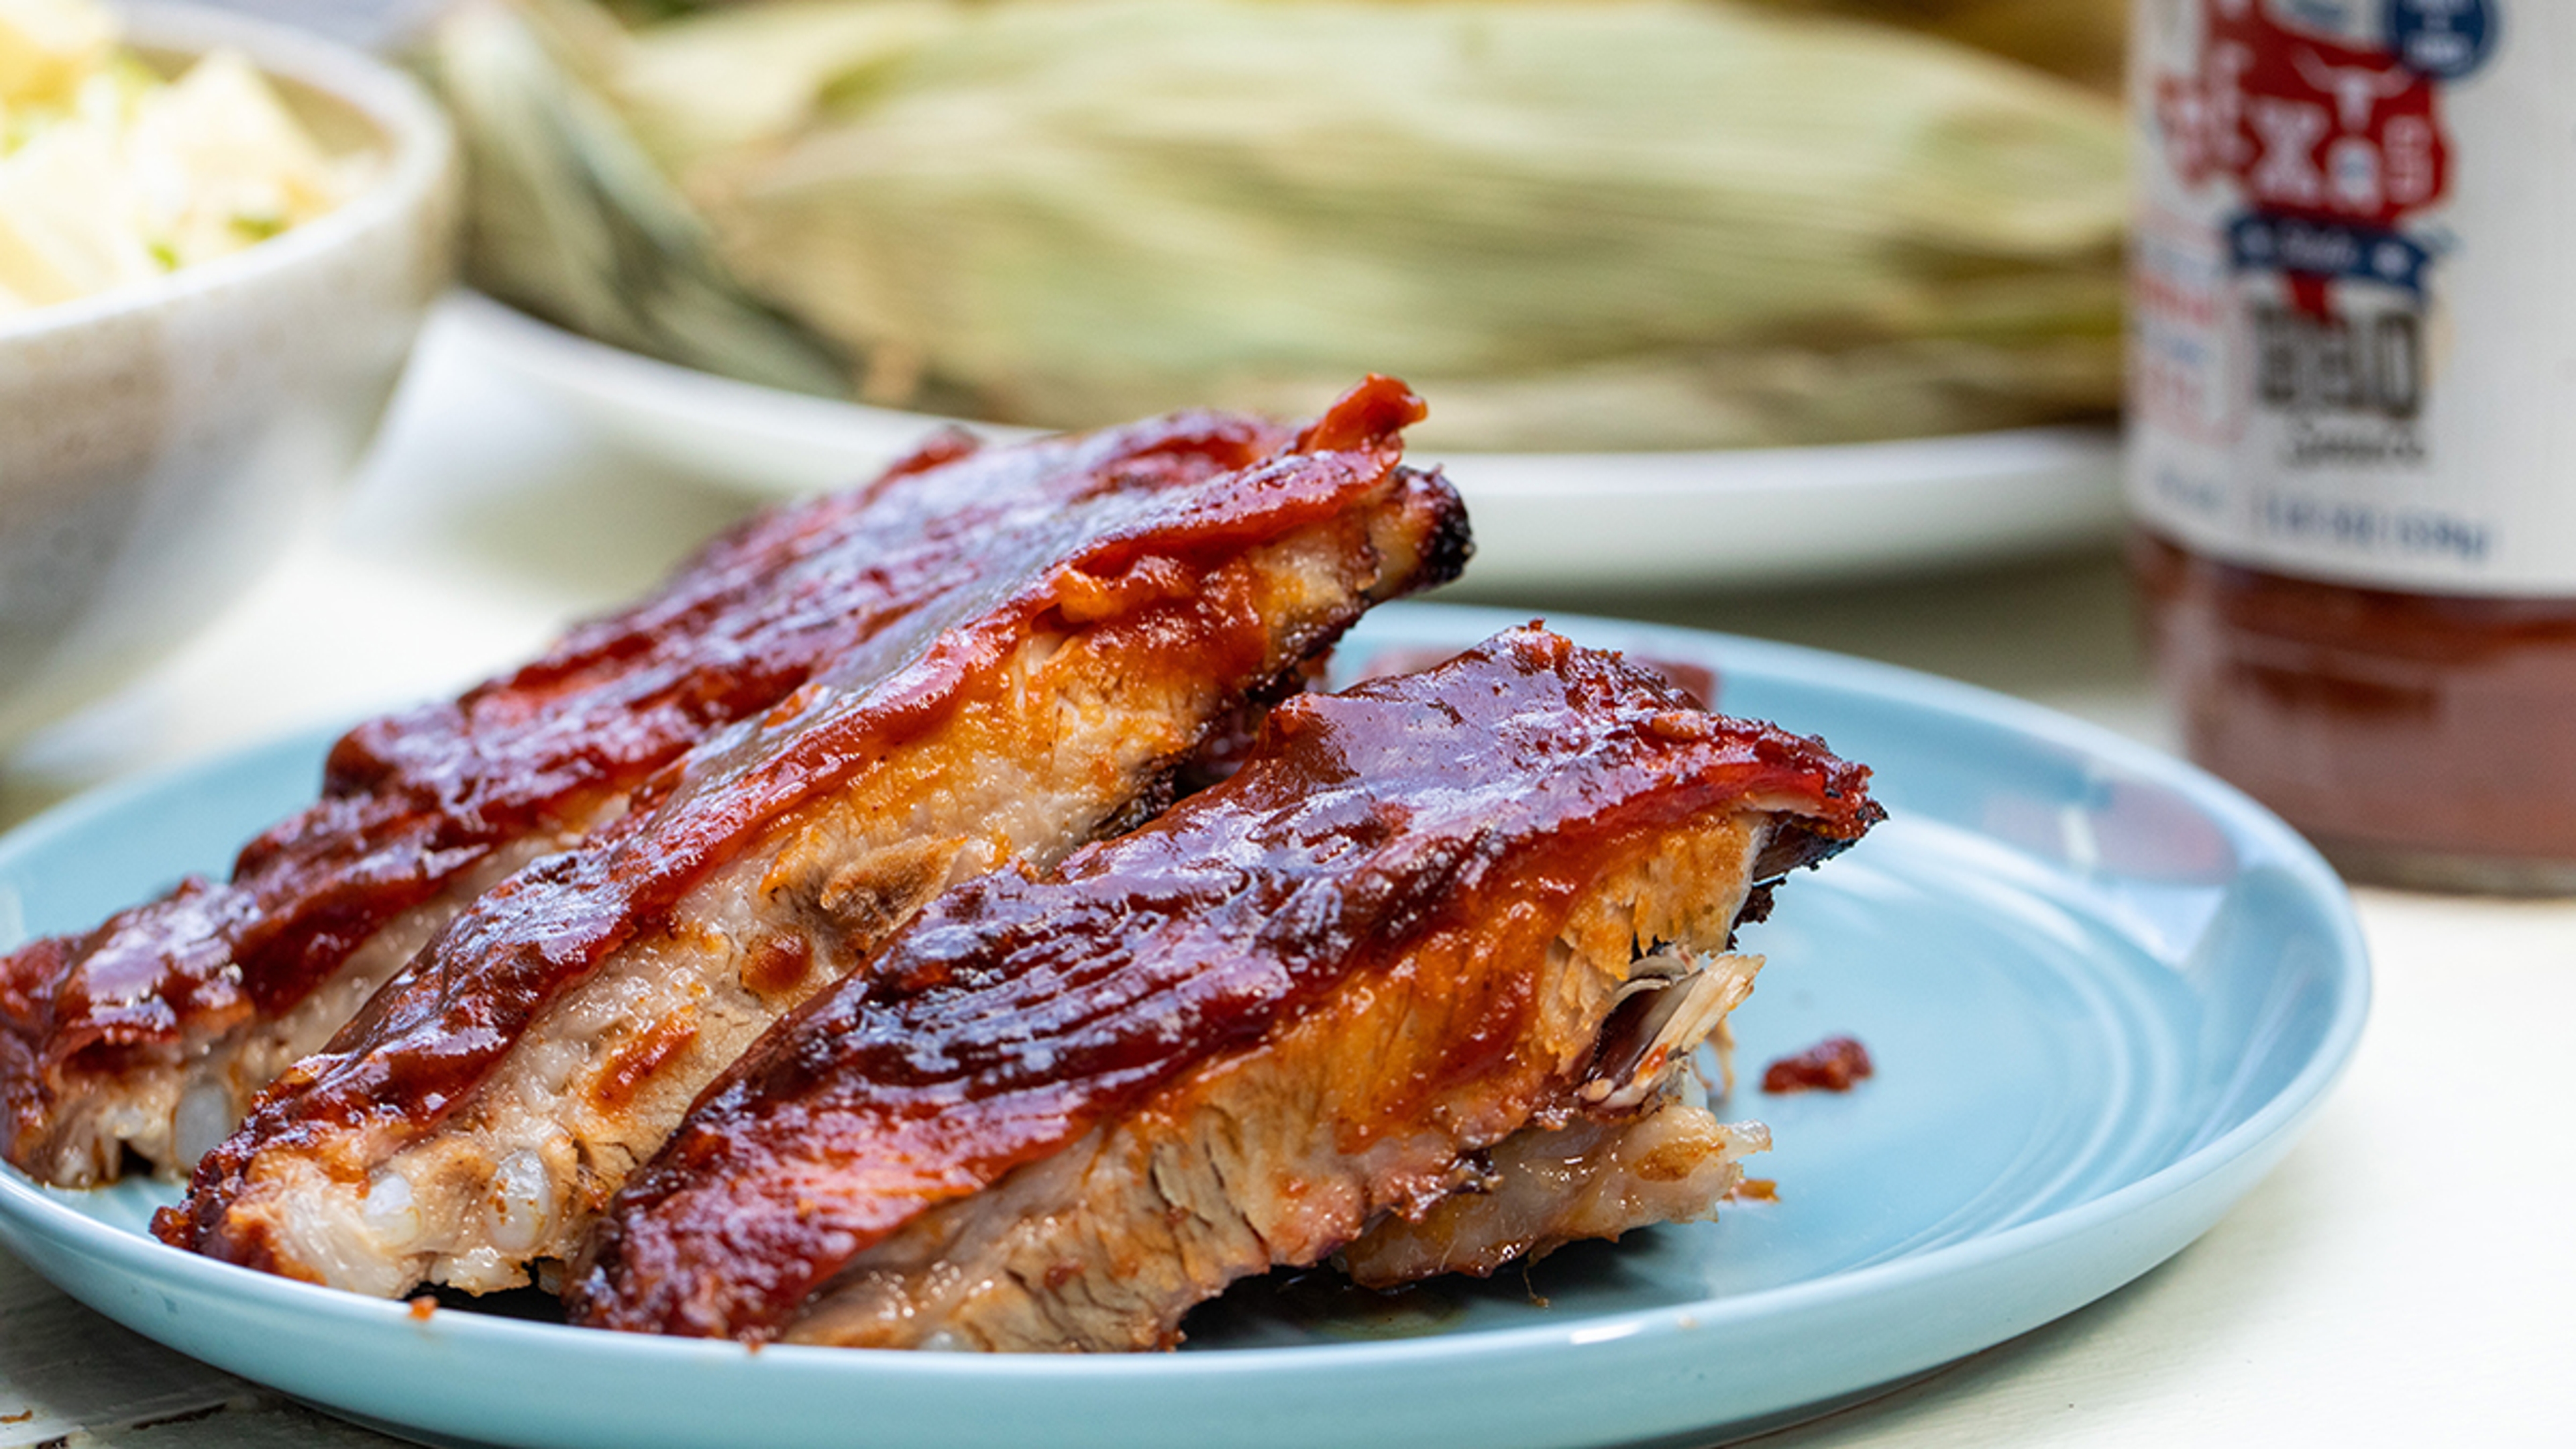
Once the membrane is removed, rub the ribs with a dry rub and let them sit overnight in the fridge. You can wrap them in plastic to help the rub stay on the meat.
Prepare the grill with two fire zones and allow it to reach about 300° F. Try to keep the fire between 275° and 300° F for the cooking.
Wrap the rib rack in foil and sprinkle a little apple juice inside the foil before closing the packet.
Place the ribs on the cooler side of the grill and cook for about two to 2 ½ hours; the meat should be tender and the internal temp around 160° F. Remove the ribs and let them rest for 30 minutes while you add wood to the fire and increase the temperature of the grill.
Remove the ribs from the foil packet and save any juice inside to brush on them. Place the racks on the grill for three minutes per side to char the outsides, and brush with reserved liquid or your favorite BBQ sauce.
READ MORE: The Complete Guide to BBQ Sauces

How to grill fish
Fish is a lot of fun to grill, and when the grill is used properly, you can get really great flavor from it. You can cook slowly and get some smoke flavor or cook on very high heat to char and quickly cook the seafood. The most important thing is to find a fishmonger or market that you trust and buy very fresh fish. Keep it cold until you are ready to cook it and keep the seasoning simple to let the fish flavor shine through. Keep an oiled towel or rag close by to run over the grill before you cook to keep the fish from sticking.
I always like to put some lemon halves on the grill with my seafood to then squeeze over the fish when it comes off the grill. This caramelizes the lemon and gives it a slightly sweet flavor.
Lobster
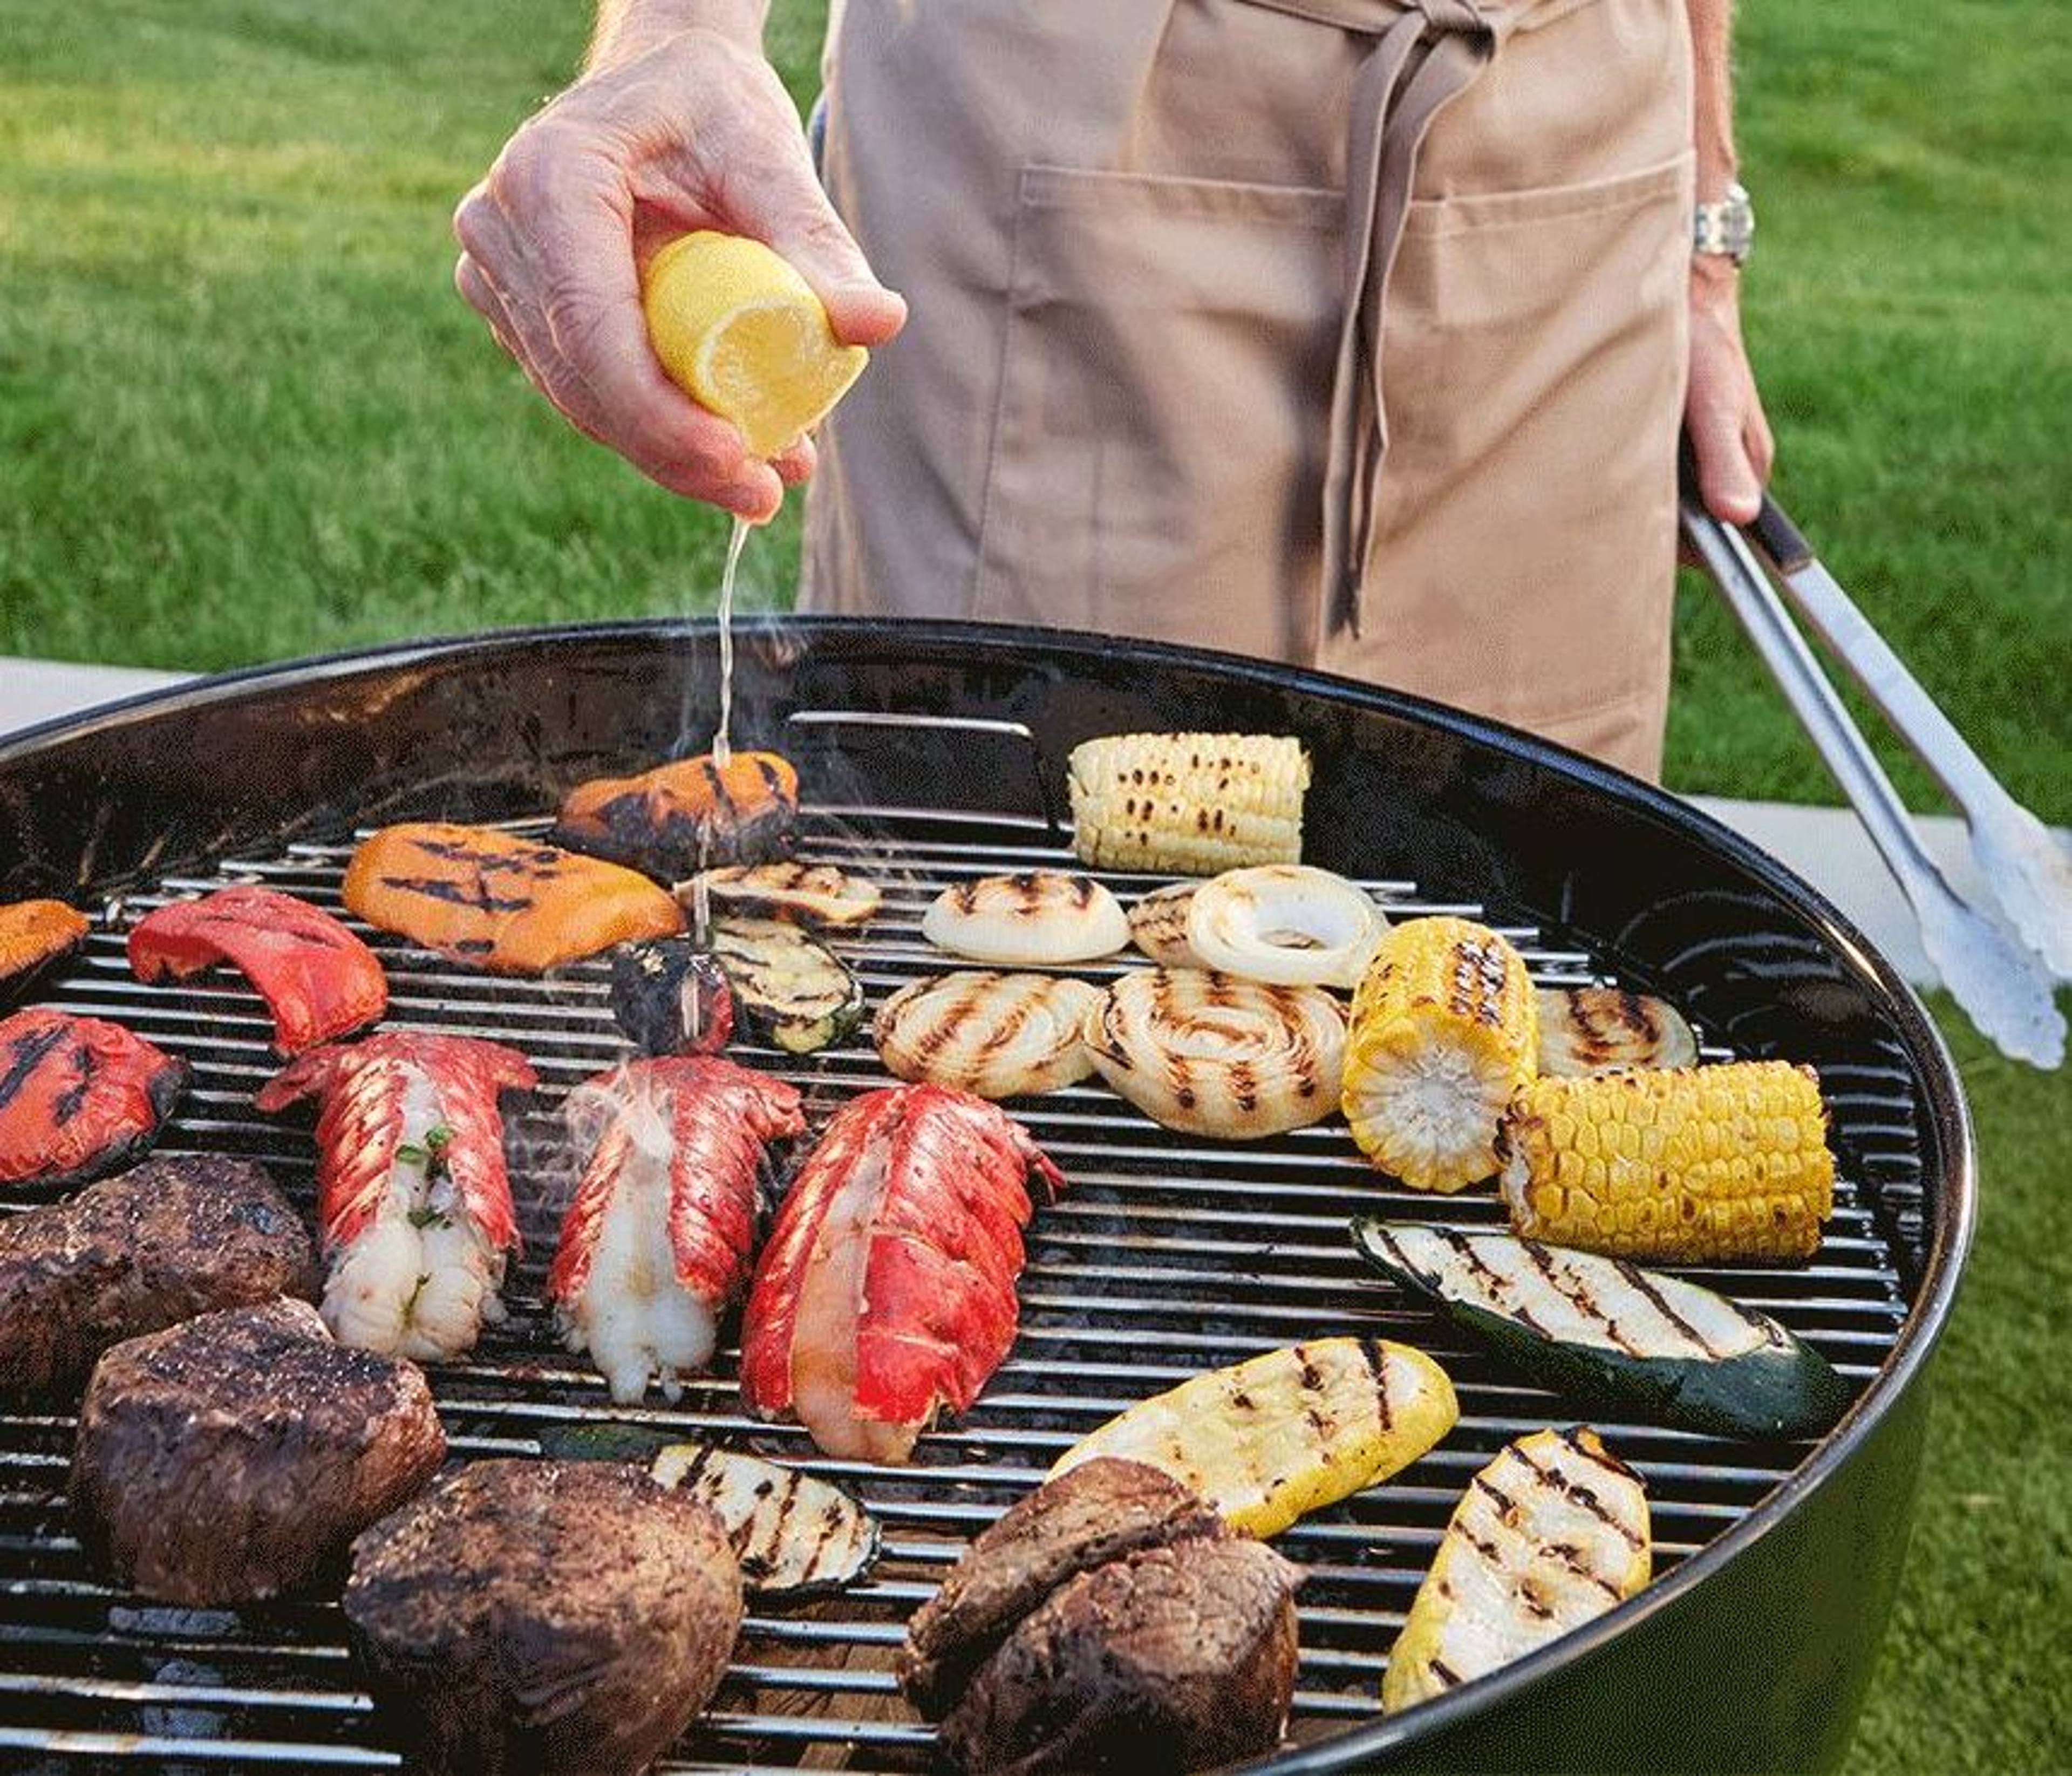
Lobster is one of my favorite proteins on the grill, especially a wood-fired one. The best kind to use are live lobsters, as these are guaranteed to be fresh. If you can't get live, then get lobster tails (just make sure they are in the shell).
Lobster is a delicate meat, and you don't want to overcook it. The best way to avoid this is by keeping it in the shell, which protects it somewhat from direct heat. Melt 4 ounces of butter with five to seven garlic cloves grated on a Microplane grater. Once you smell the garlic, remove the butter from the heat and stir in the zest of two lemons, a handful of chopped parsley, and some red pepper flakes. Take your lobster tails, split them lengthwise, and place them on a tray. When the butter has cooled slightly, pour it all over the lobster meat.
The other thing the shell does is hold in the juices and that delicious garlic butter.
Season with salt and pepper, and place the lobster shell-side down on the grill just off the direct heat; keep the lid on to get some smoke on the meat. Cook for five to seven minutes, until the butter is sizzling and the meat is firm to the touch. Do not overcook!
Make sure you toast some bread to sop up the garlic butter at the end.
Mahi-mahi
Mahi-mahi is a delicate fish, but it's easy to make on the grill. I cut the mahi lengthwise into 2-inch strips, and then marinate it with some cilantro (left whole), lime zest, and sliced chilis. Get a grill pan, and heat it until it's nice and hot. (Because of the fish's fat content, it chars well in the grill pan.) Before putting the fish in the pan, rub a paper towel with oil on it over the pan to make sure the fish does not stick. Two to three minutes per side, and you are ready to make fish tacos!
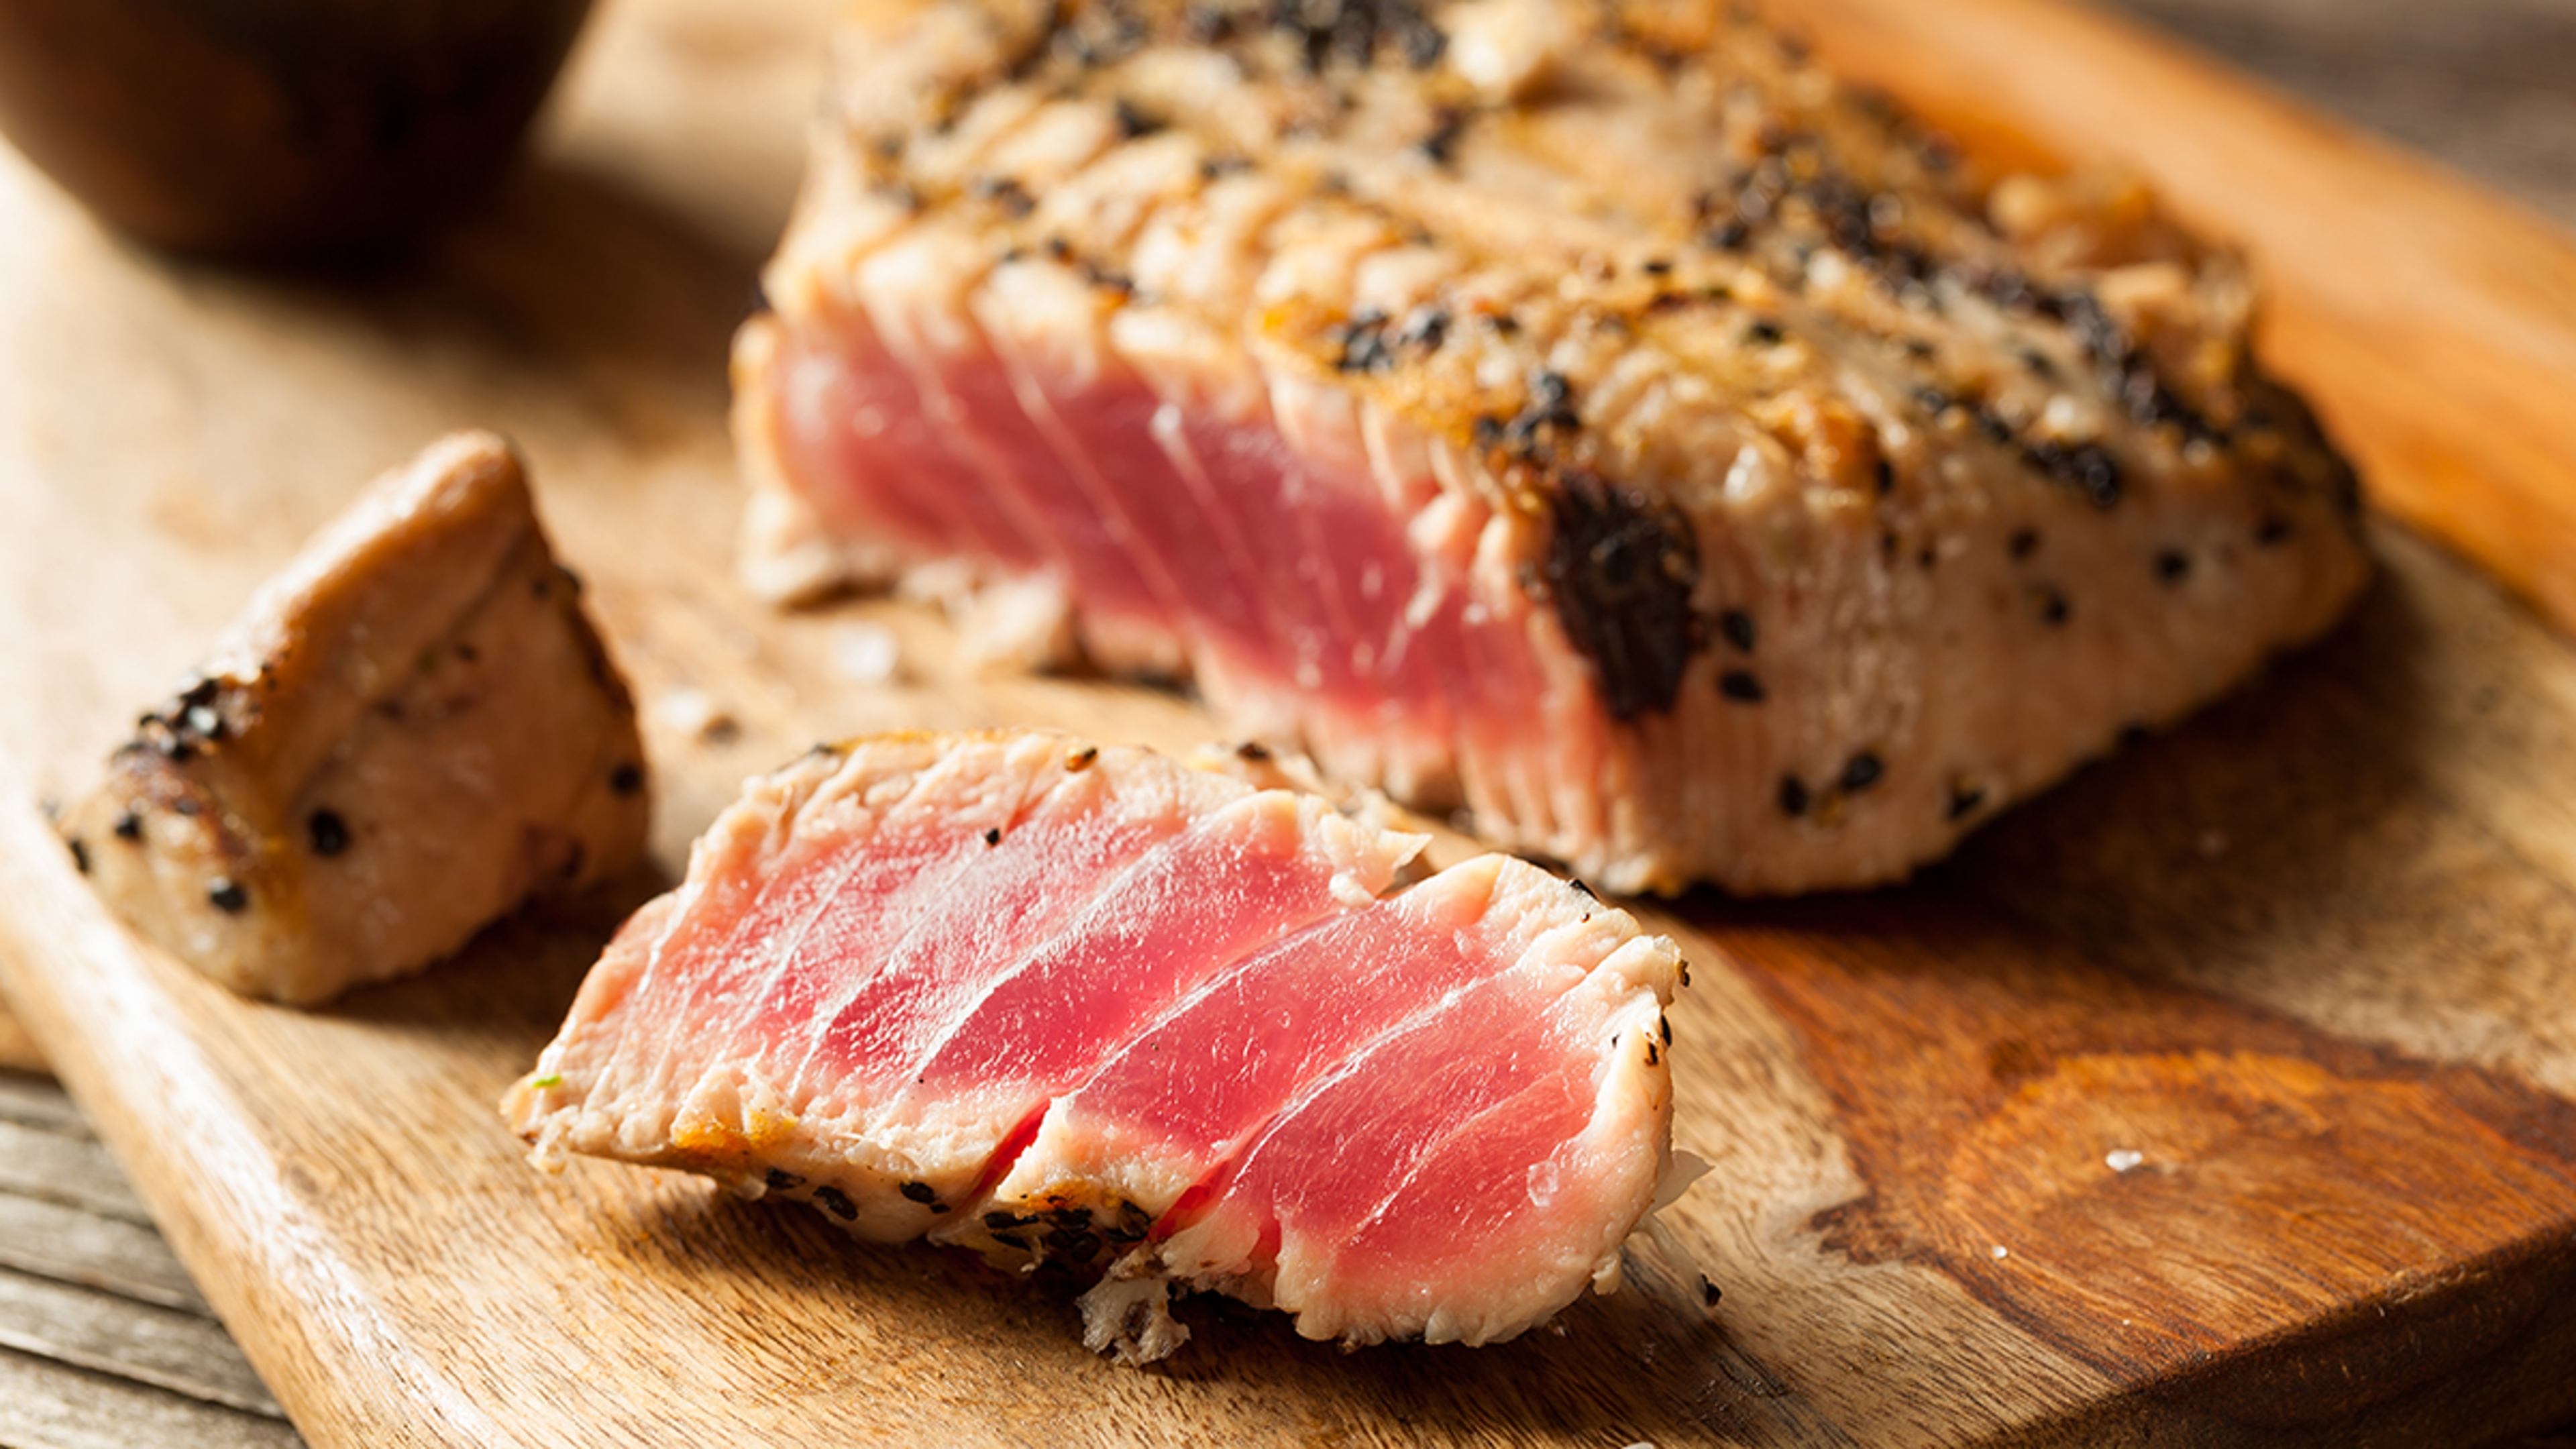
Tuna
When it comes to tuna, there are two ways I like to cook it: slow-poached in olive oil for sandwiches or seared on a very hot surface and left rare in the middle. You can do either method on any type of grill, but you have to: 1) make sure the grill is very hot and very clean, and 2) rub the grill grate with oil before putting on your fish.
Get a nice thick filet (two-to-three-inch cut) and season it well with salt, pepper, and any other seasoning you like to make a crust. (I like furikake — a savory and salty Japanese seasoning — or sesame seeds.) Give it a good two minutes per side, if that, to char it well and crust the seasonings, and then let it rest for about five minutes. Then, slice it and serve with a raw vegetable salad or some grilled fava beans.
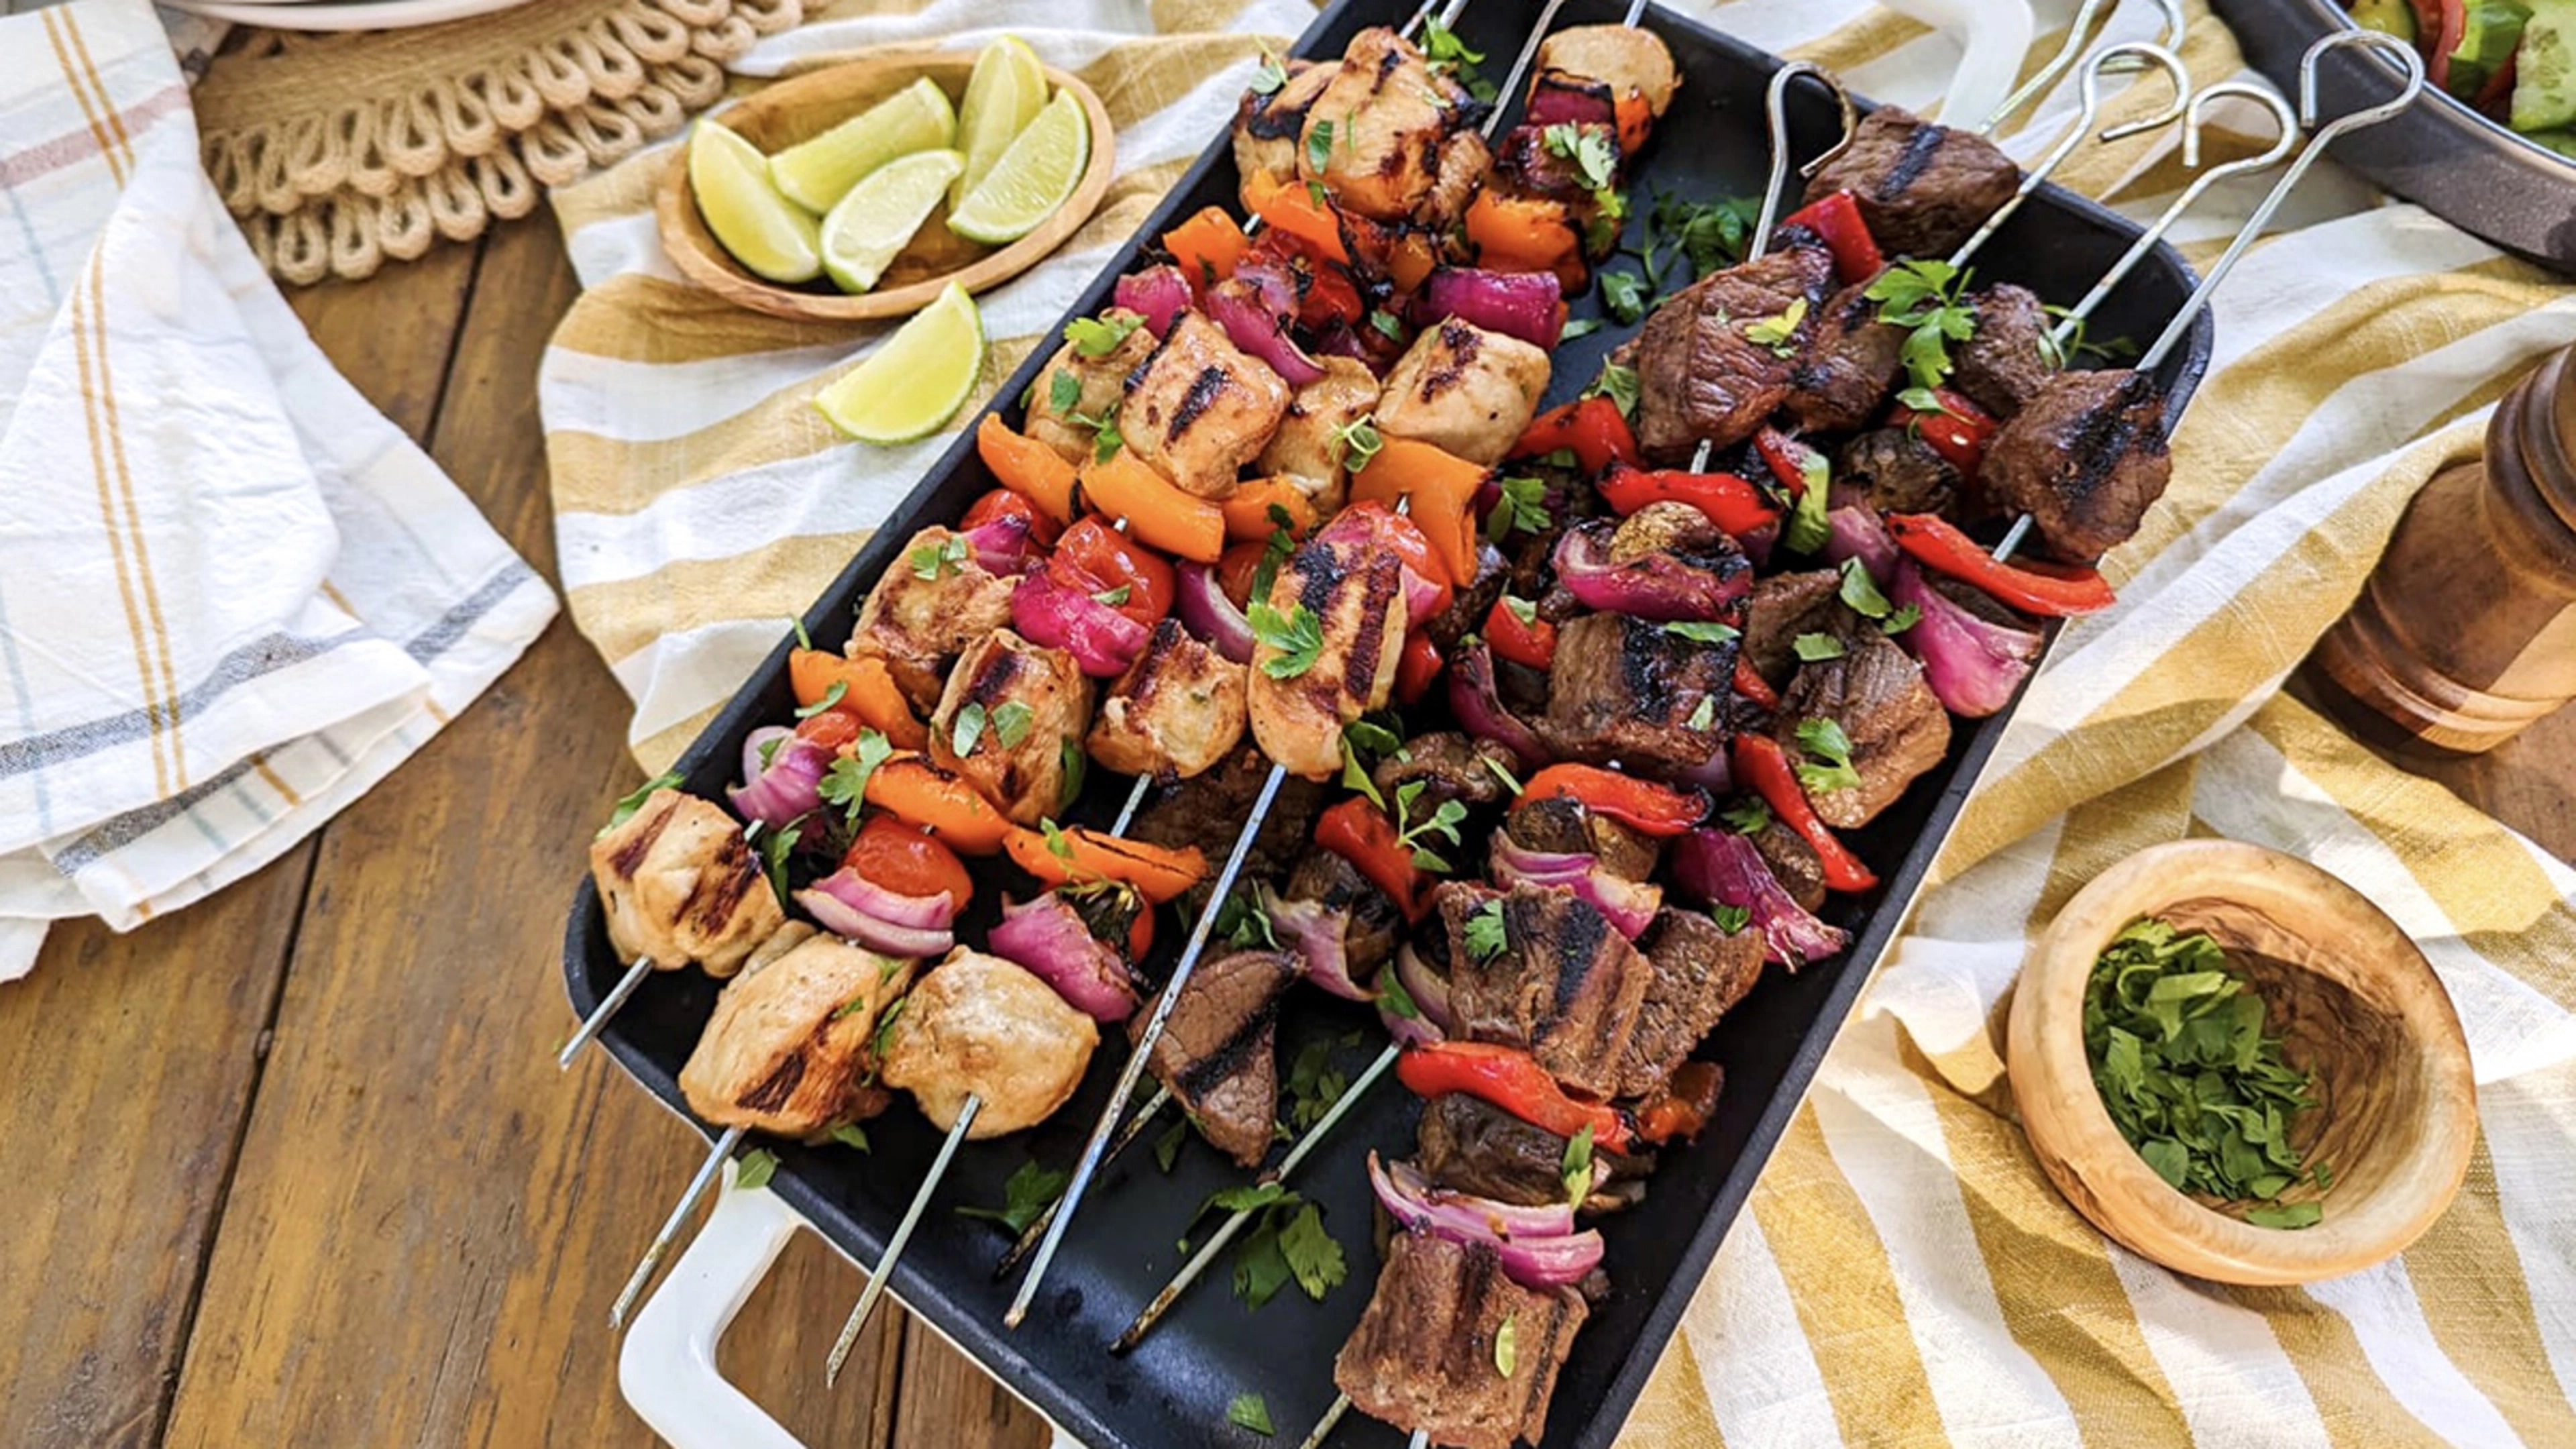
Shrimp
Depending on their size, shrimp can be tricky to grill, but they taste really good when done right. Shrimp will also overcook very quickly, so the key to grilling them is a hot, clean grill and good marinade.
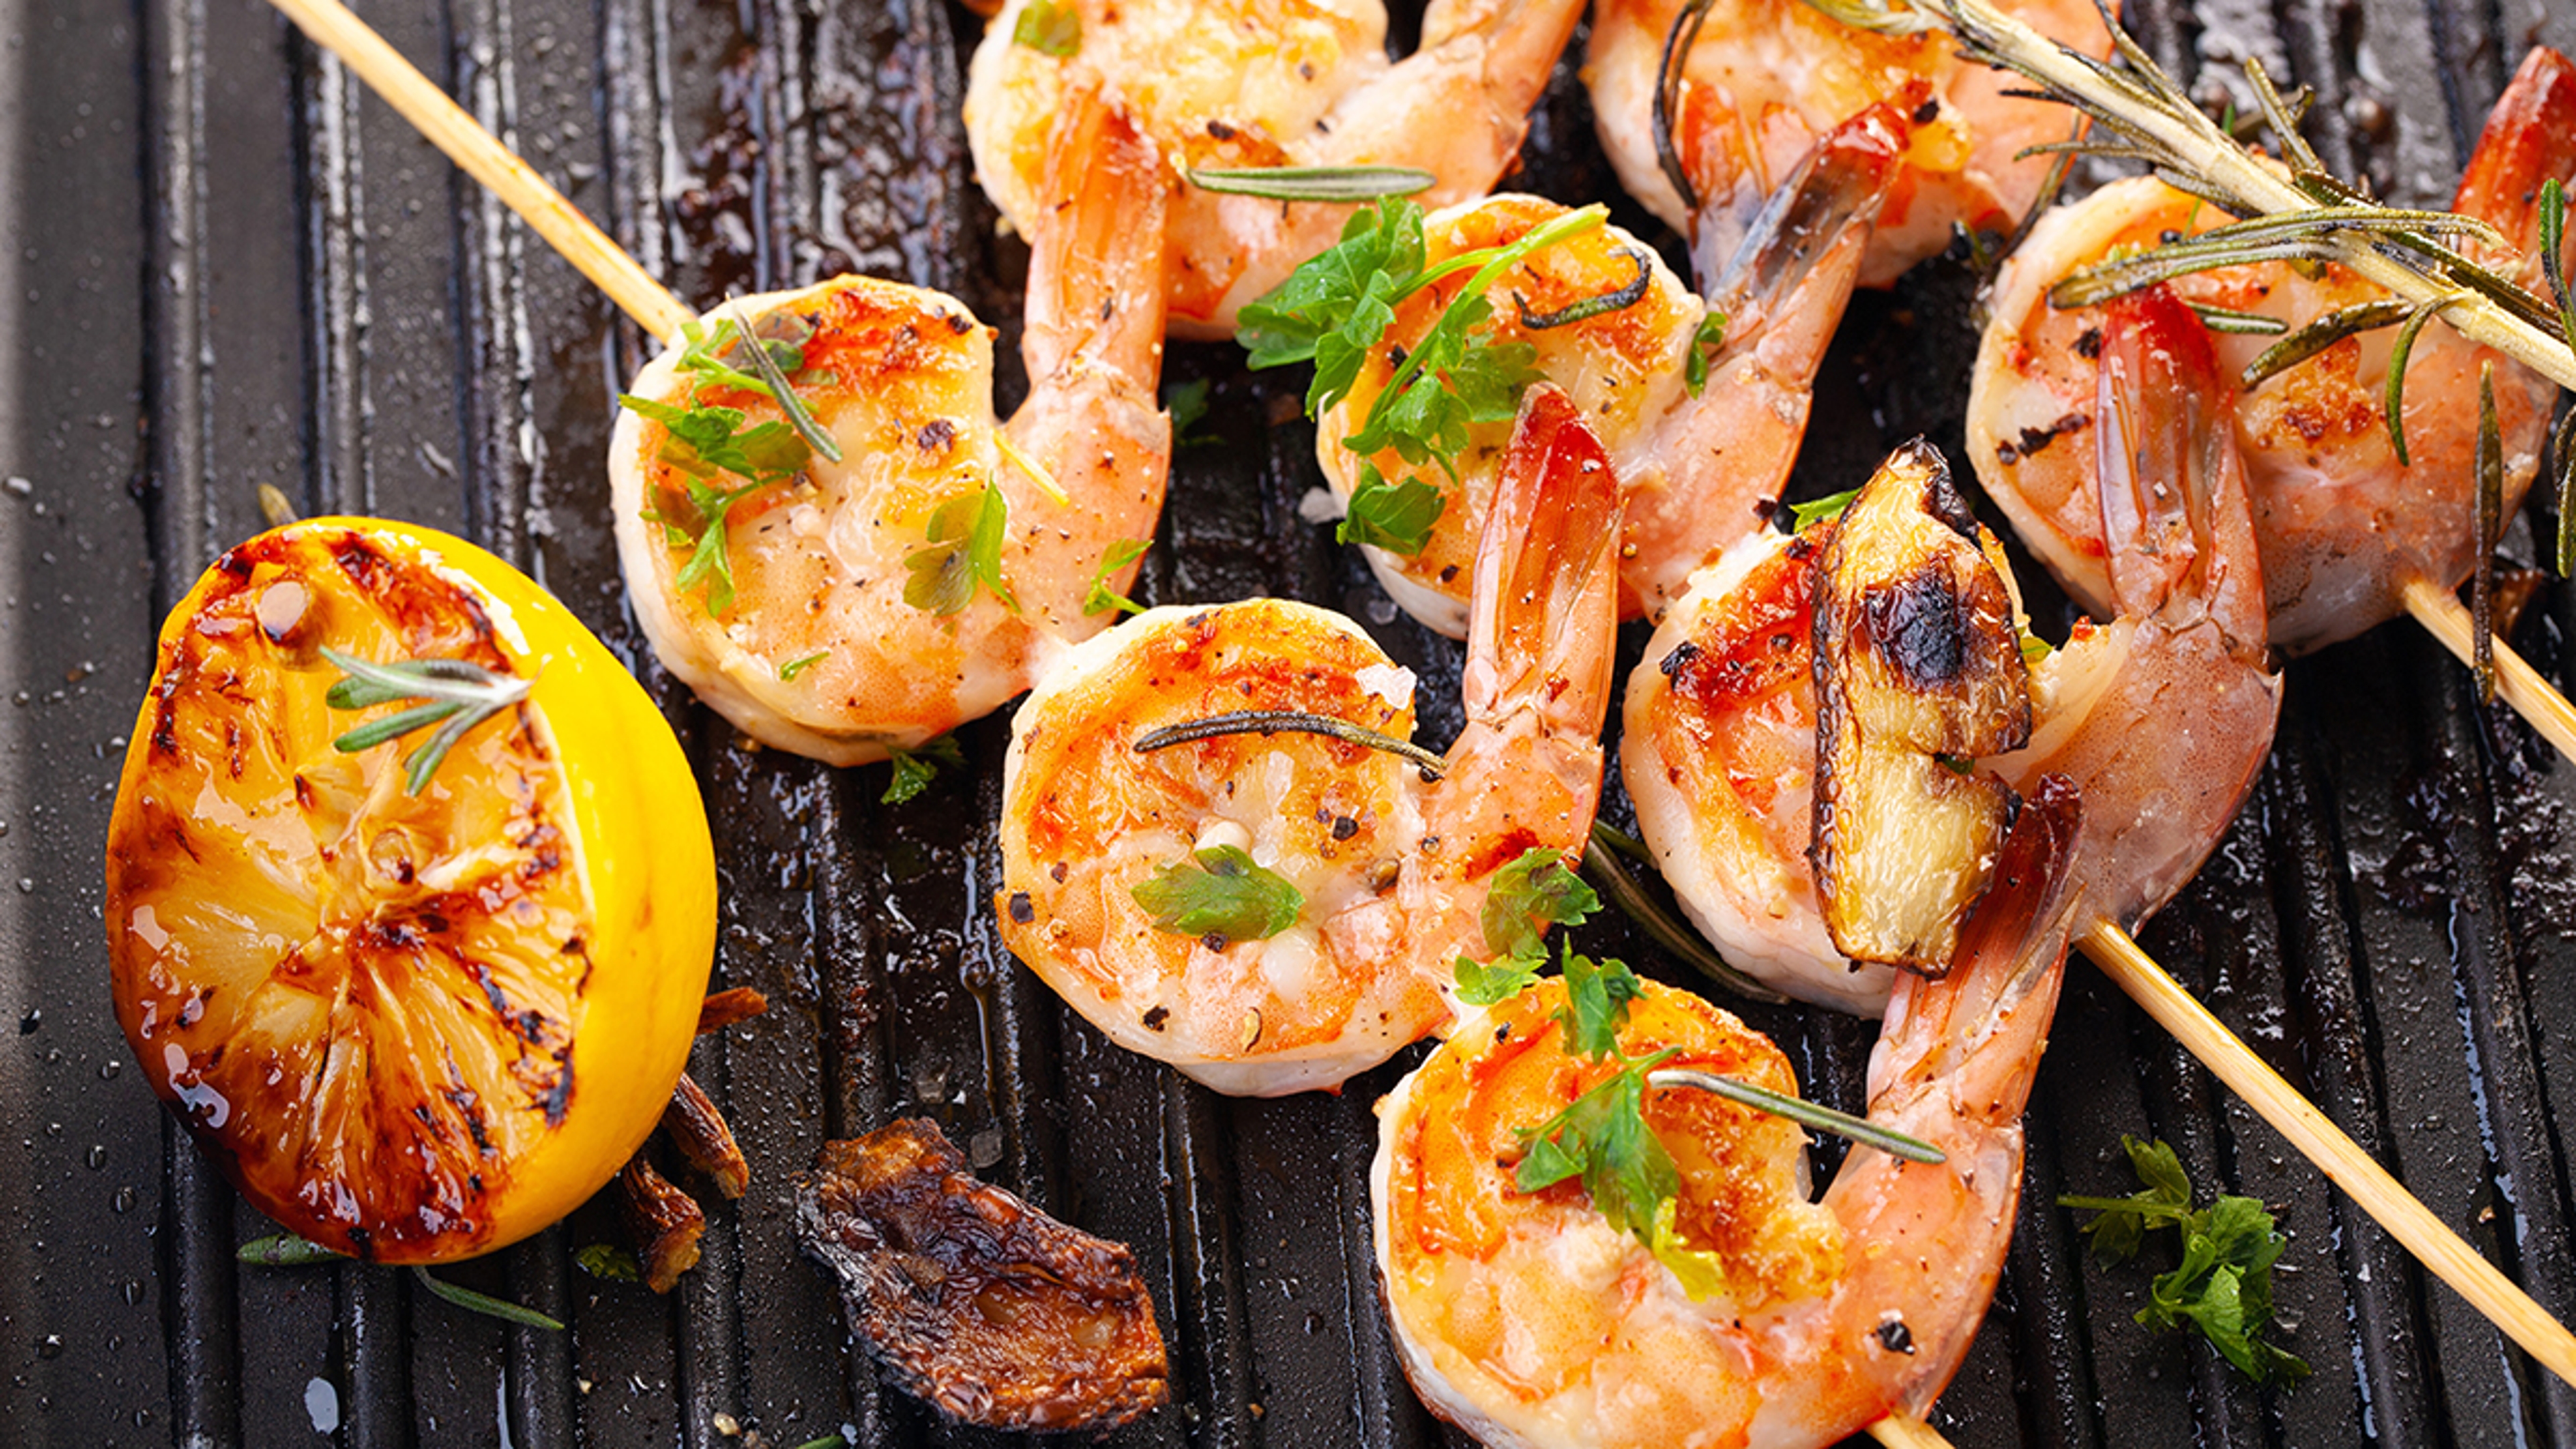
Prepare your grill, allowing it to preheat and making sure it is clean and oiled.
Marinate the shrimp for about an hour in a mixture of grated ginger, a spoonful each of fish sauce and soy sauce, some sesame oil, and a bunch of roughly chopped cilantro and basil. Using wood skewers, thread four to five shrimp on each skewer, leaving little room between to make sure they cook through.
Tip: Soak the wood skewers in water before skewering shrimp so they don't burn.
Tip: Lay the shrimp flat on a tray, tails facing the same direction, and push the skewer through.
Grill for two to three minutes per side, depending on the size of the shrimp. The shrimp are done when they've just turned pink. DO NOT OVERCOOK!
Brush a little of the reserved marinade over the shrimp right before removing from the grill.
READ MORE: Shrimp 5 Ways
How to grill vegetables
Cooking vegetables on the grill can really change the way you feel about vegetables. It transforms their flavor and gives them a texture that you don't normally get by cooking on the stove. Grilling also helps bring out the natural sweetness of many vegetables.
You can season and treat vegetables just like you would meat and the same flavor profiles work for many of them.
Cauliflower
Cauliflower can be done a couple of different ways: either cut into thick, two-inch steaks or roasted whole. For steaks, marinate them in a chimichurri sauce or pesto for a couple of hours. Grill over medium-high heat for about four minutes on each side. You can cook until tender or take them off when they are al dente.
To do a whole cauliflower head, trim the base and remove any leaves from the head. Rub generously with olive oil and season well with salt, pepper, ground chili, ground cumin, oregano, and lemon zest. Wrap the head in foil and place the cauliflower on the lower heat side of the grill for 50 to 60 minutes or until your desired tenderness — test the doneness by sticking a small knife into the cauliflower. After 50 to 60 minutes, unwrap the cauliflower and pour any liquid in the foil back on the cauliflower. Place it unwrapped a little closer to the heat and cook for another 20 minutes until it has taken on some color and smoke.
Remove from the grill and wrap lightly with plastic. Let rest for 30 minutes, and then unwrap and slice into wedges.
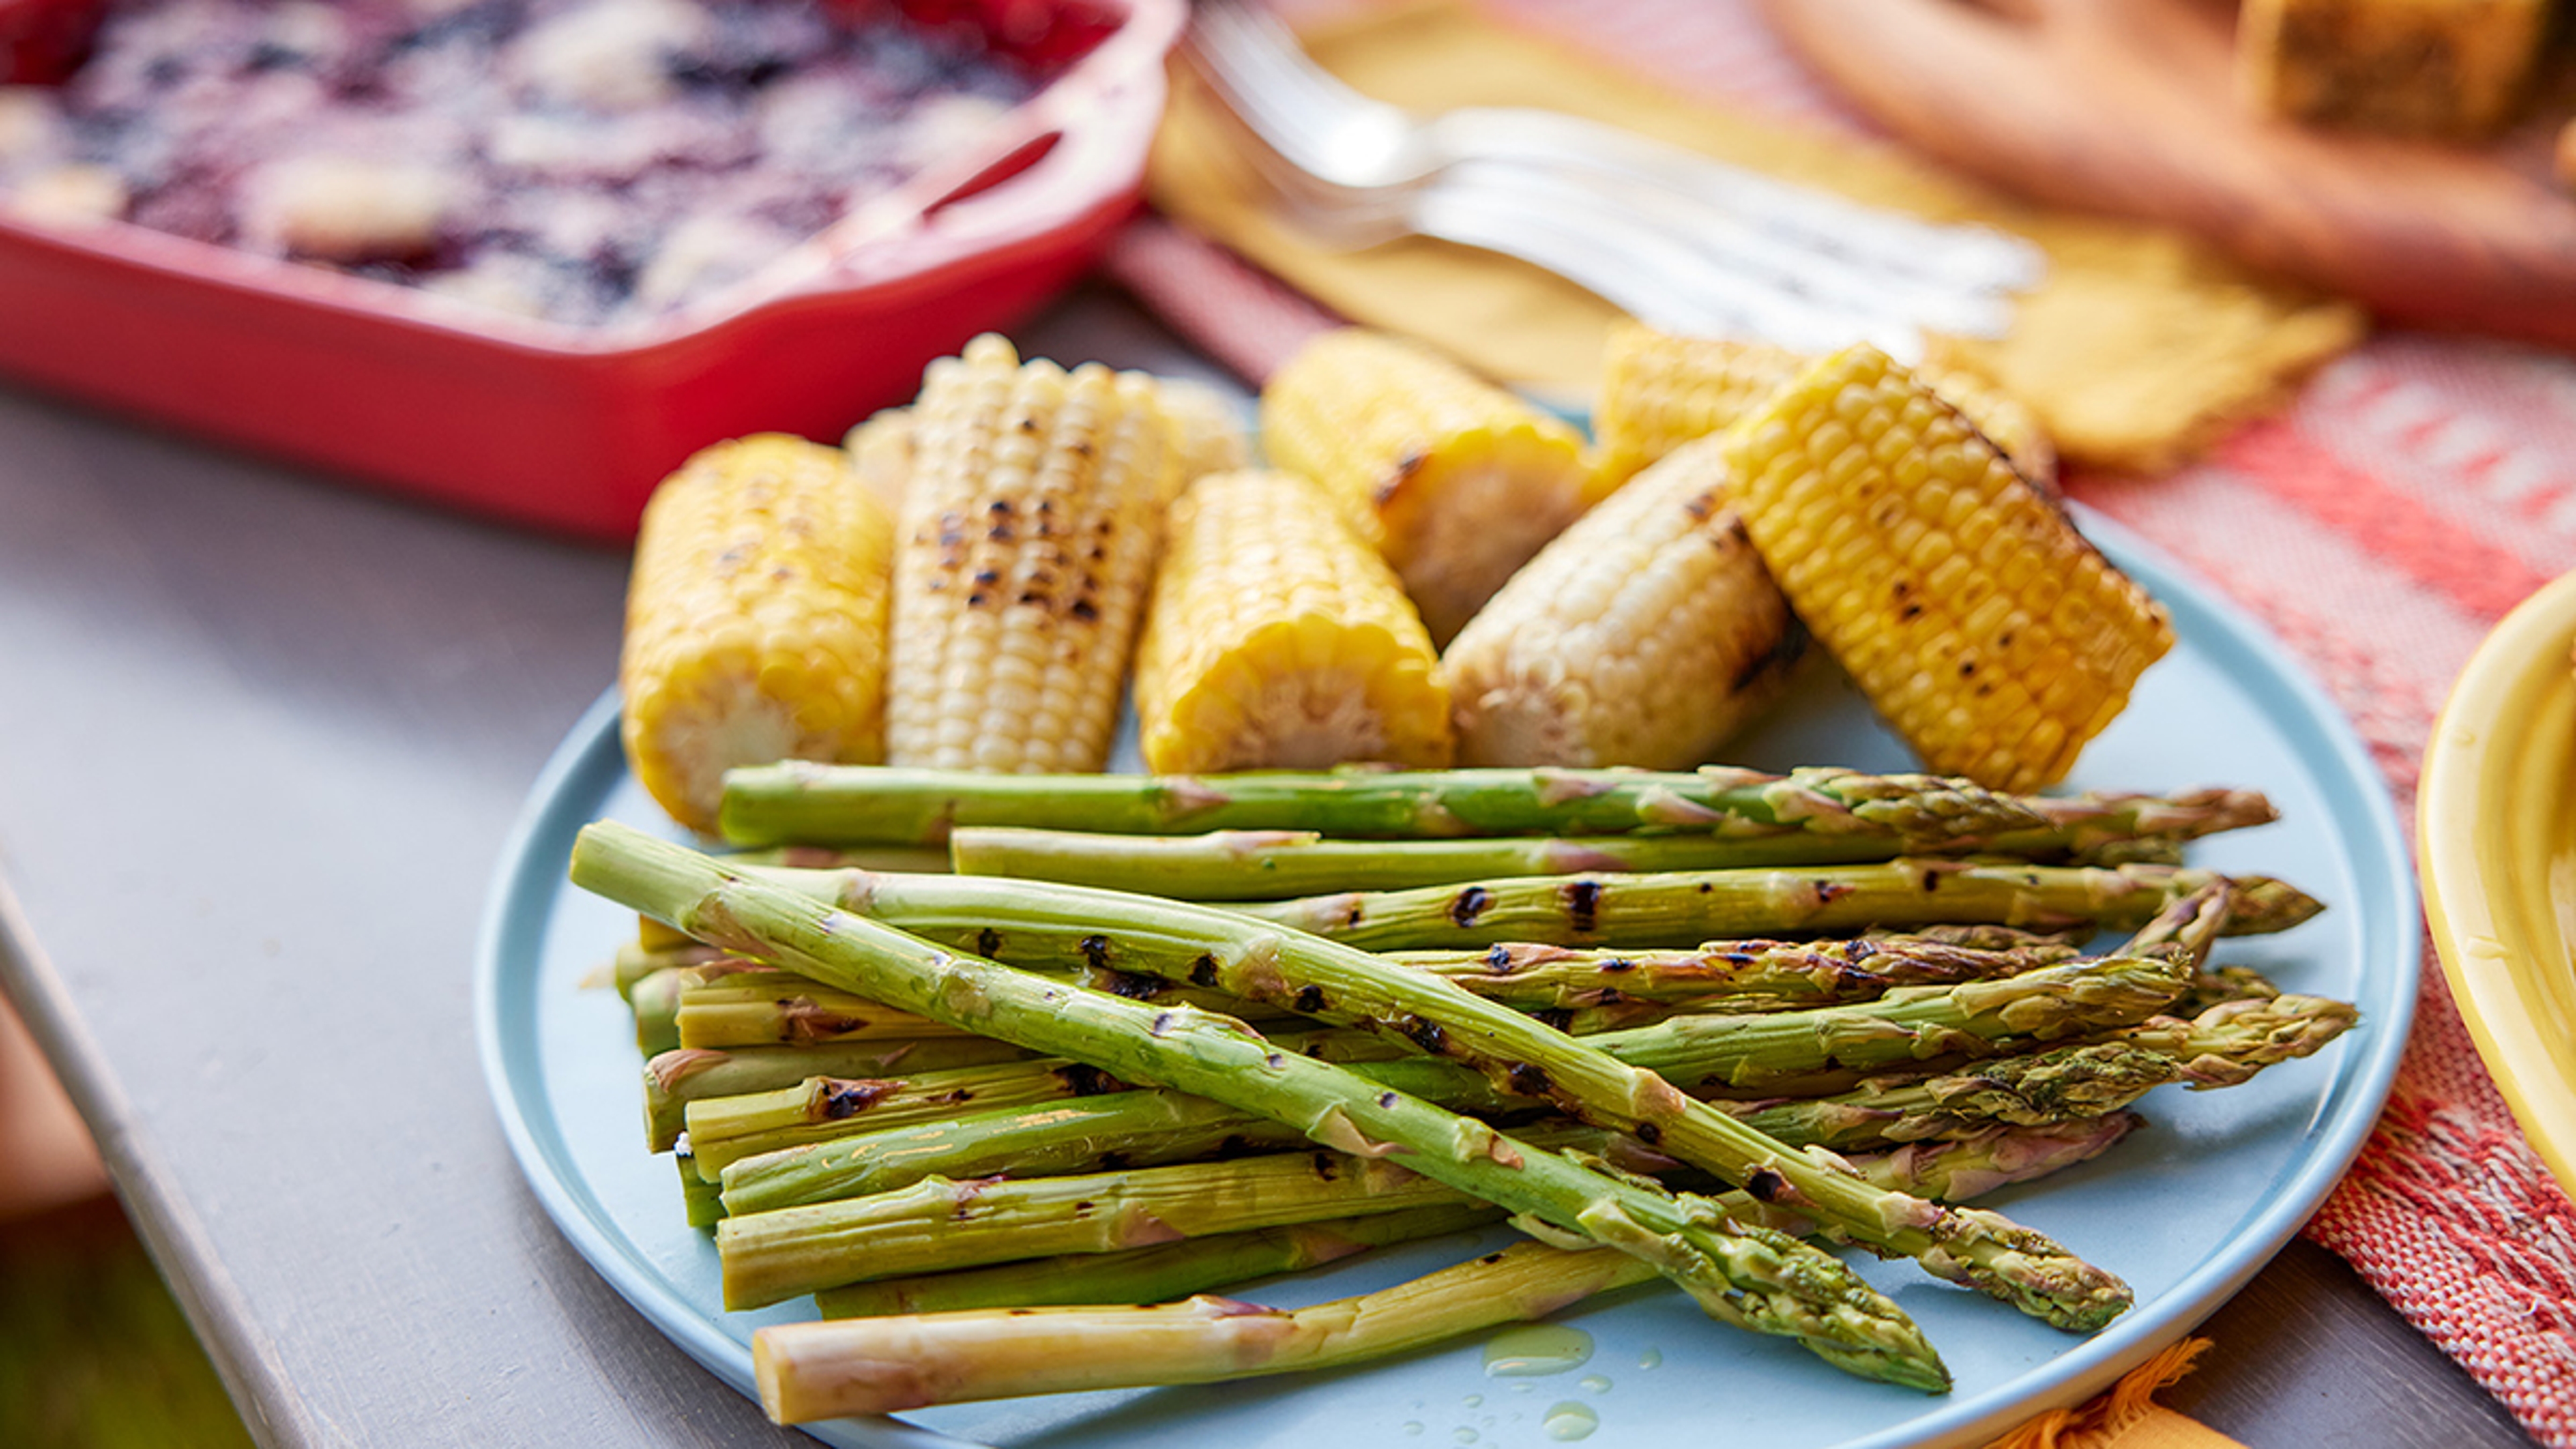
Asparagus
Asparagus is one of my favorite vegetables to grill. It is simple and delicious and meant to be eaten in season (peak season is April and May).
Prepare the asparagus by trimming the bottom third — the white part — and discarding it.
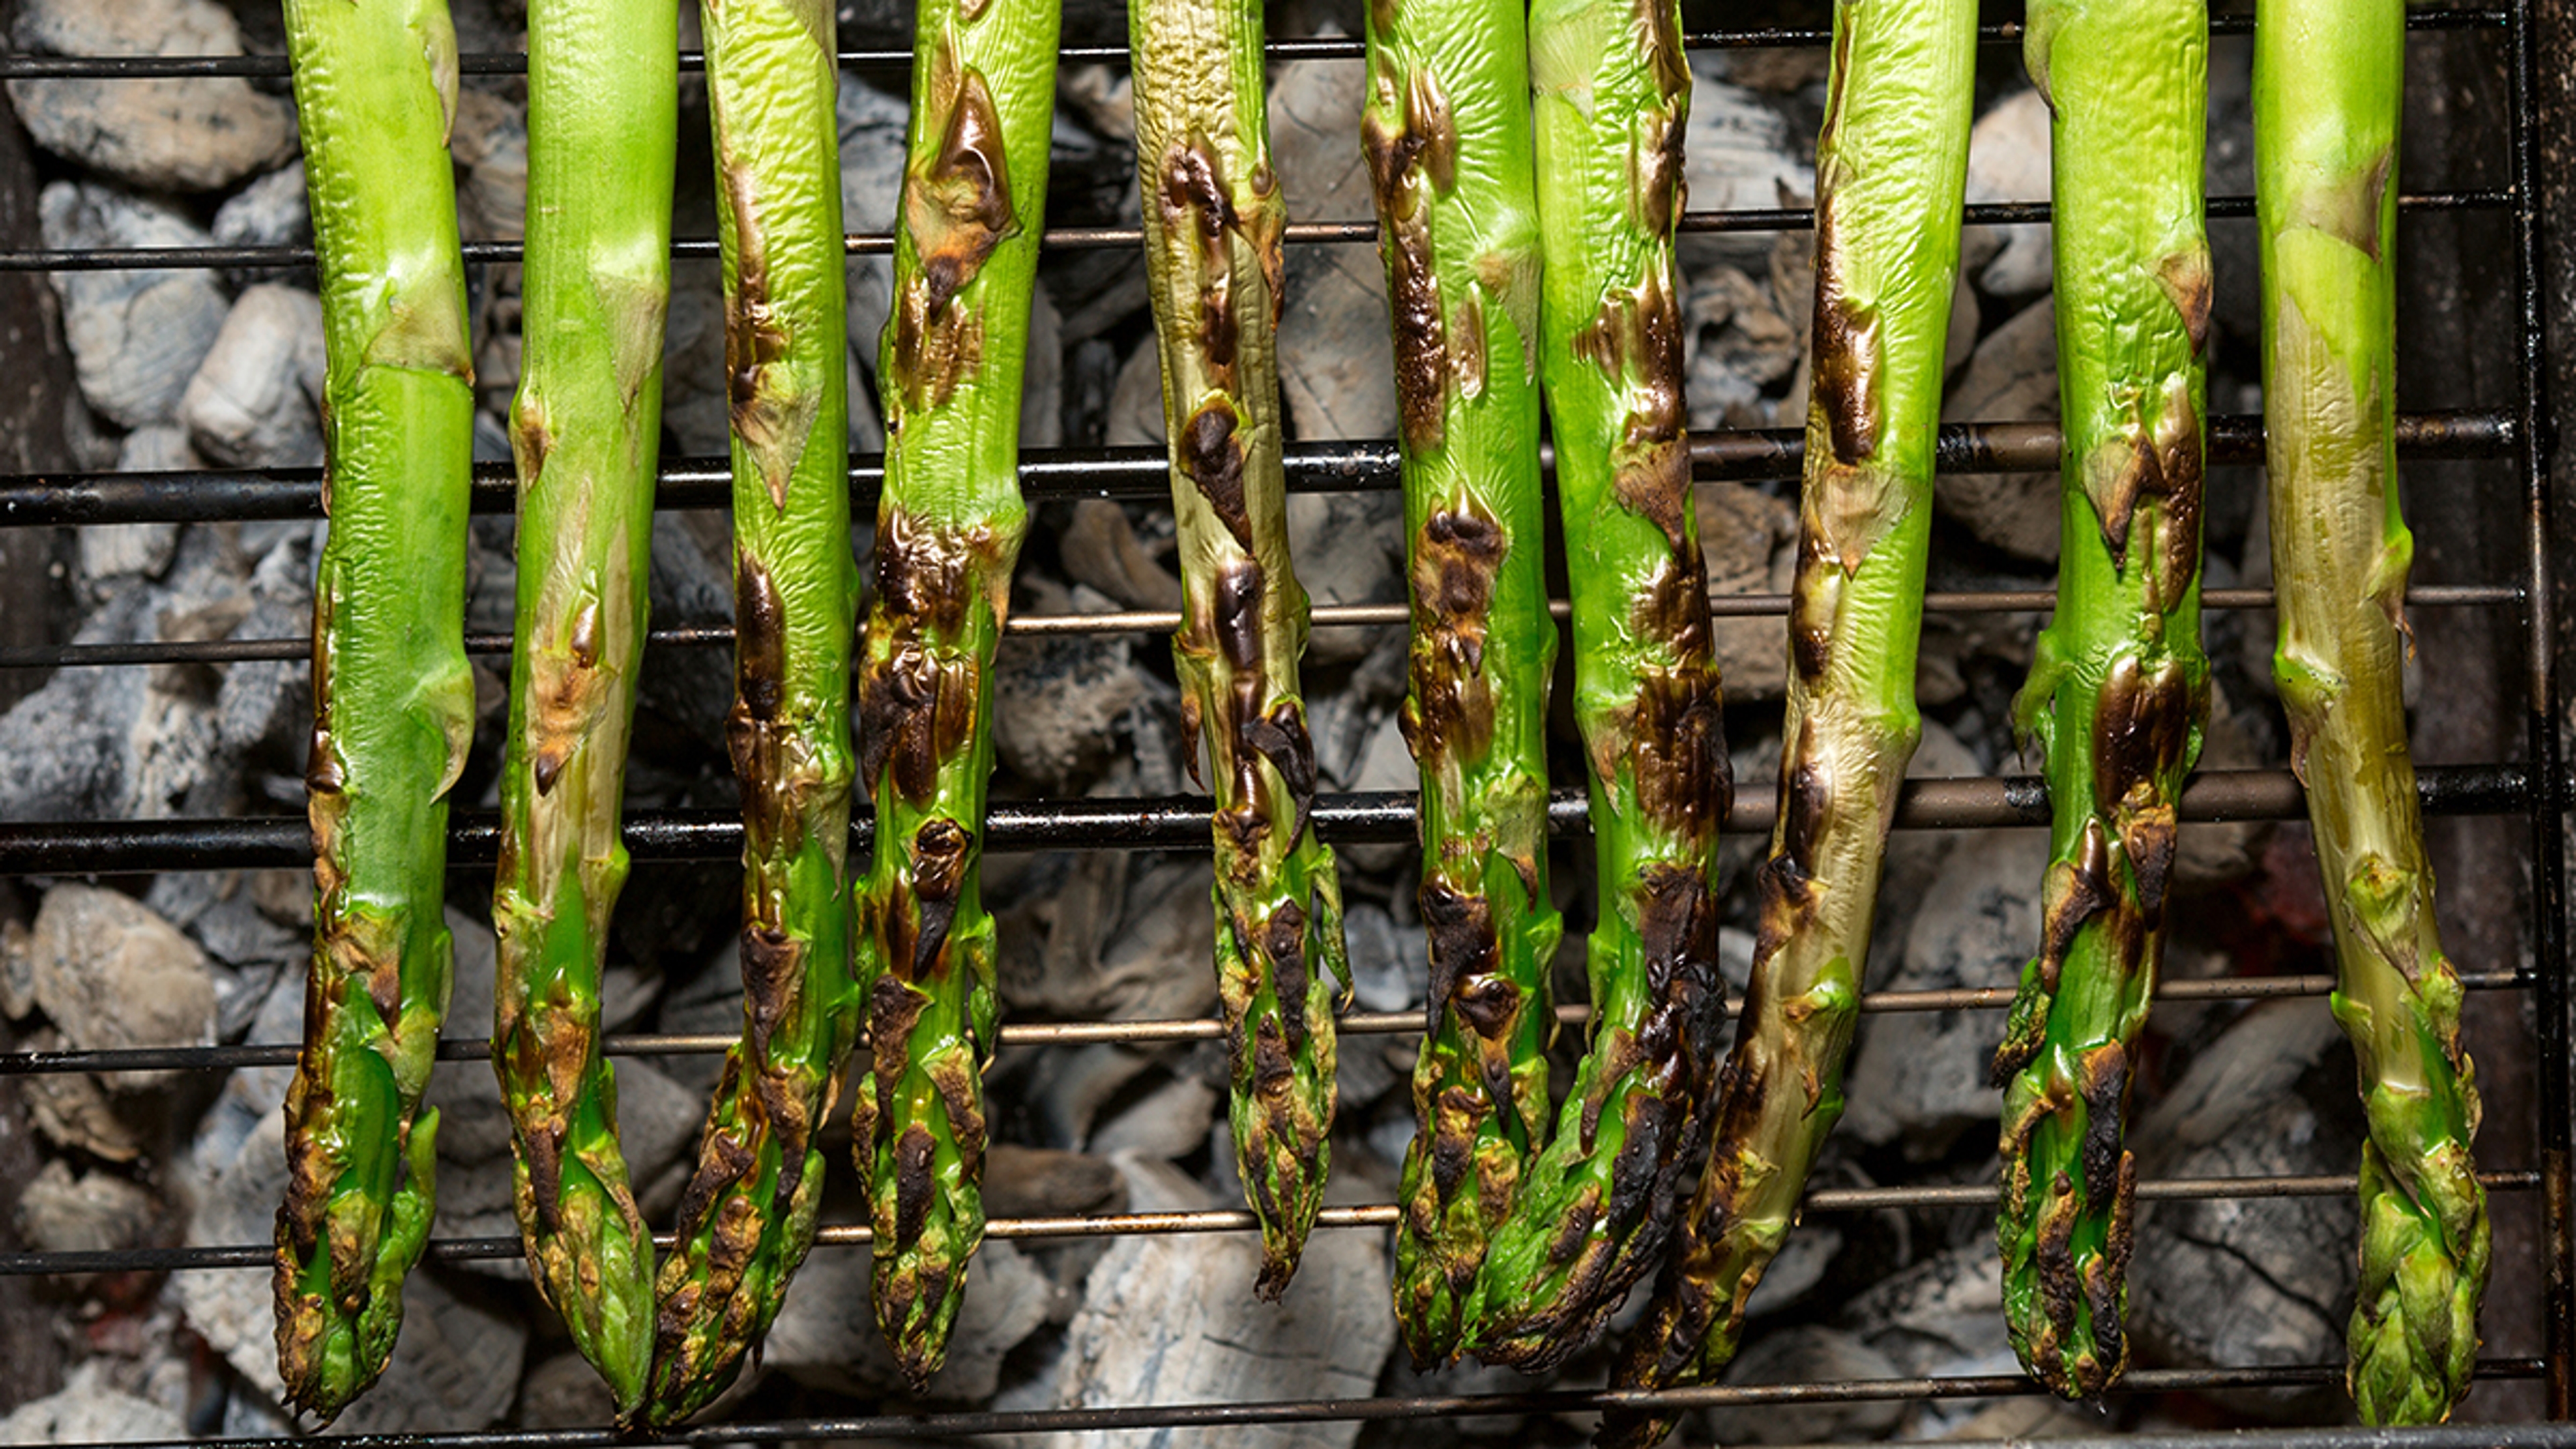
Season with olive oil, salt, and pepper on a tray, and roll around to coat.
Place the asparagus on a hot, preheated grill (preferably over wood). Grill until the asparagus spears are slightly charred and have a little bite to them.
Remove from the grill, squeeze some lemon over them and give them a sprinkle of Japanese chili flakes. Or drizzle a little balsamic glaze and some torn basil leaves, and finish with grated Parmesan cheese.
Lettuces and kale
If you've never had a grilled salad, you are missing out.
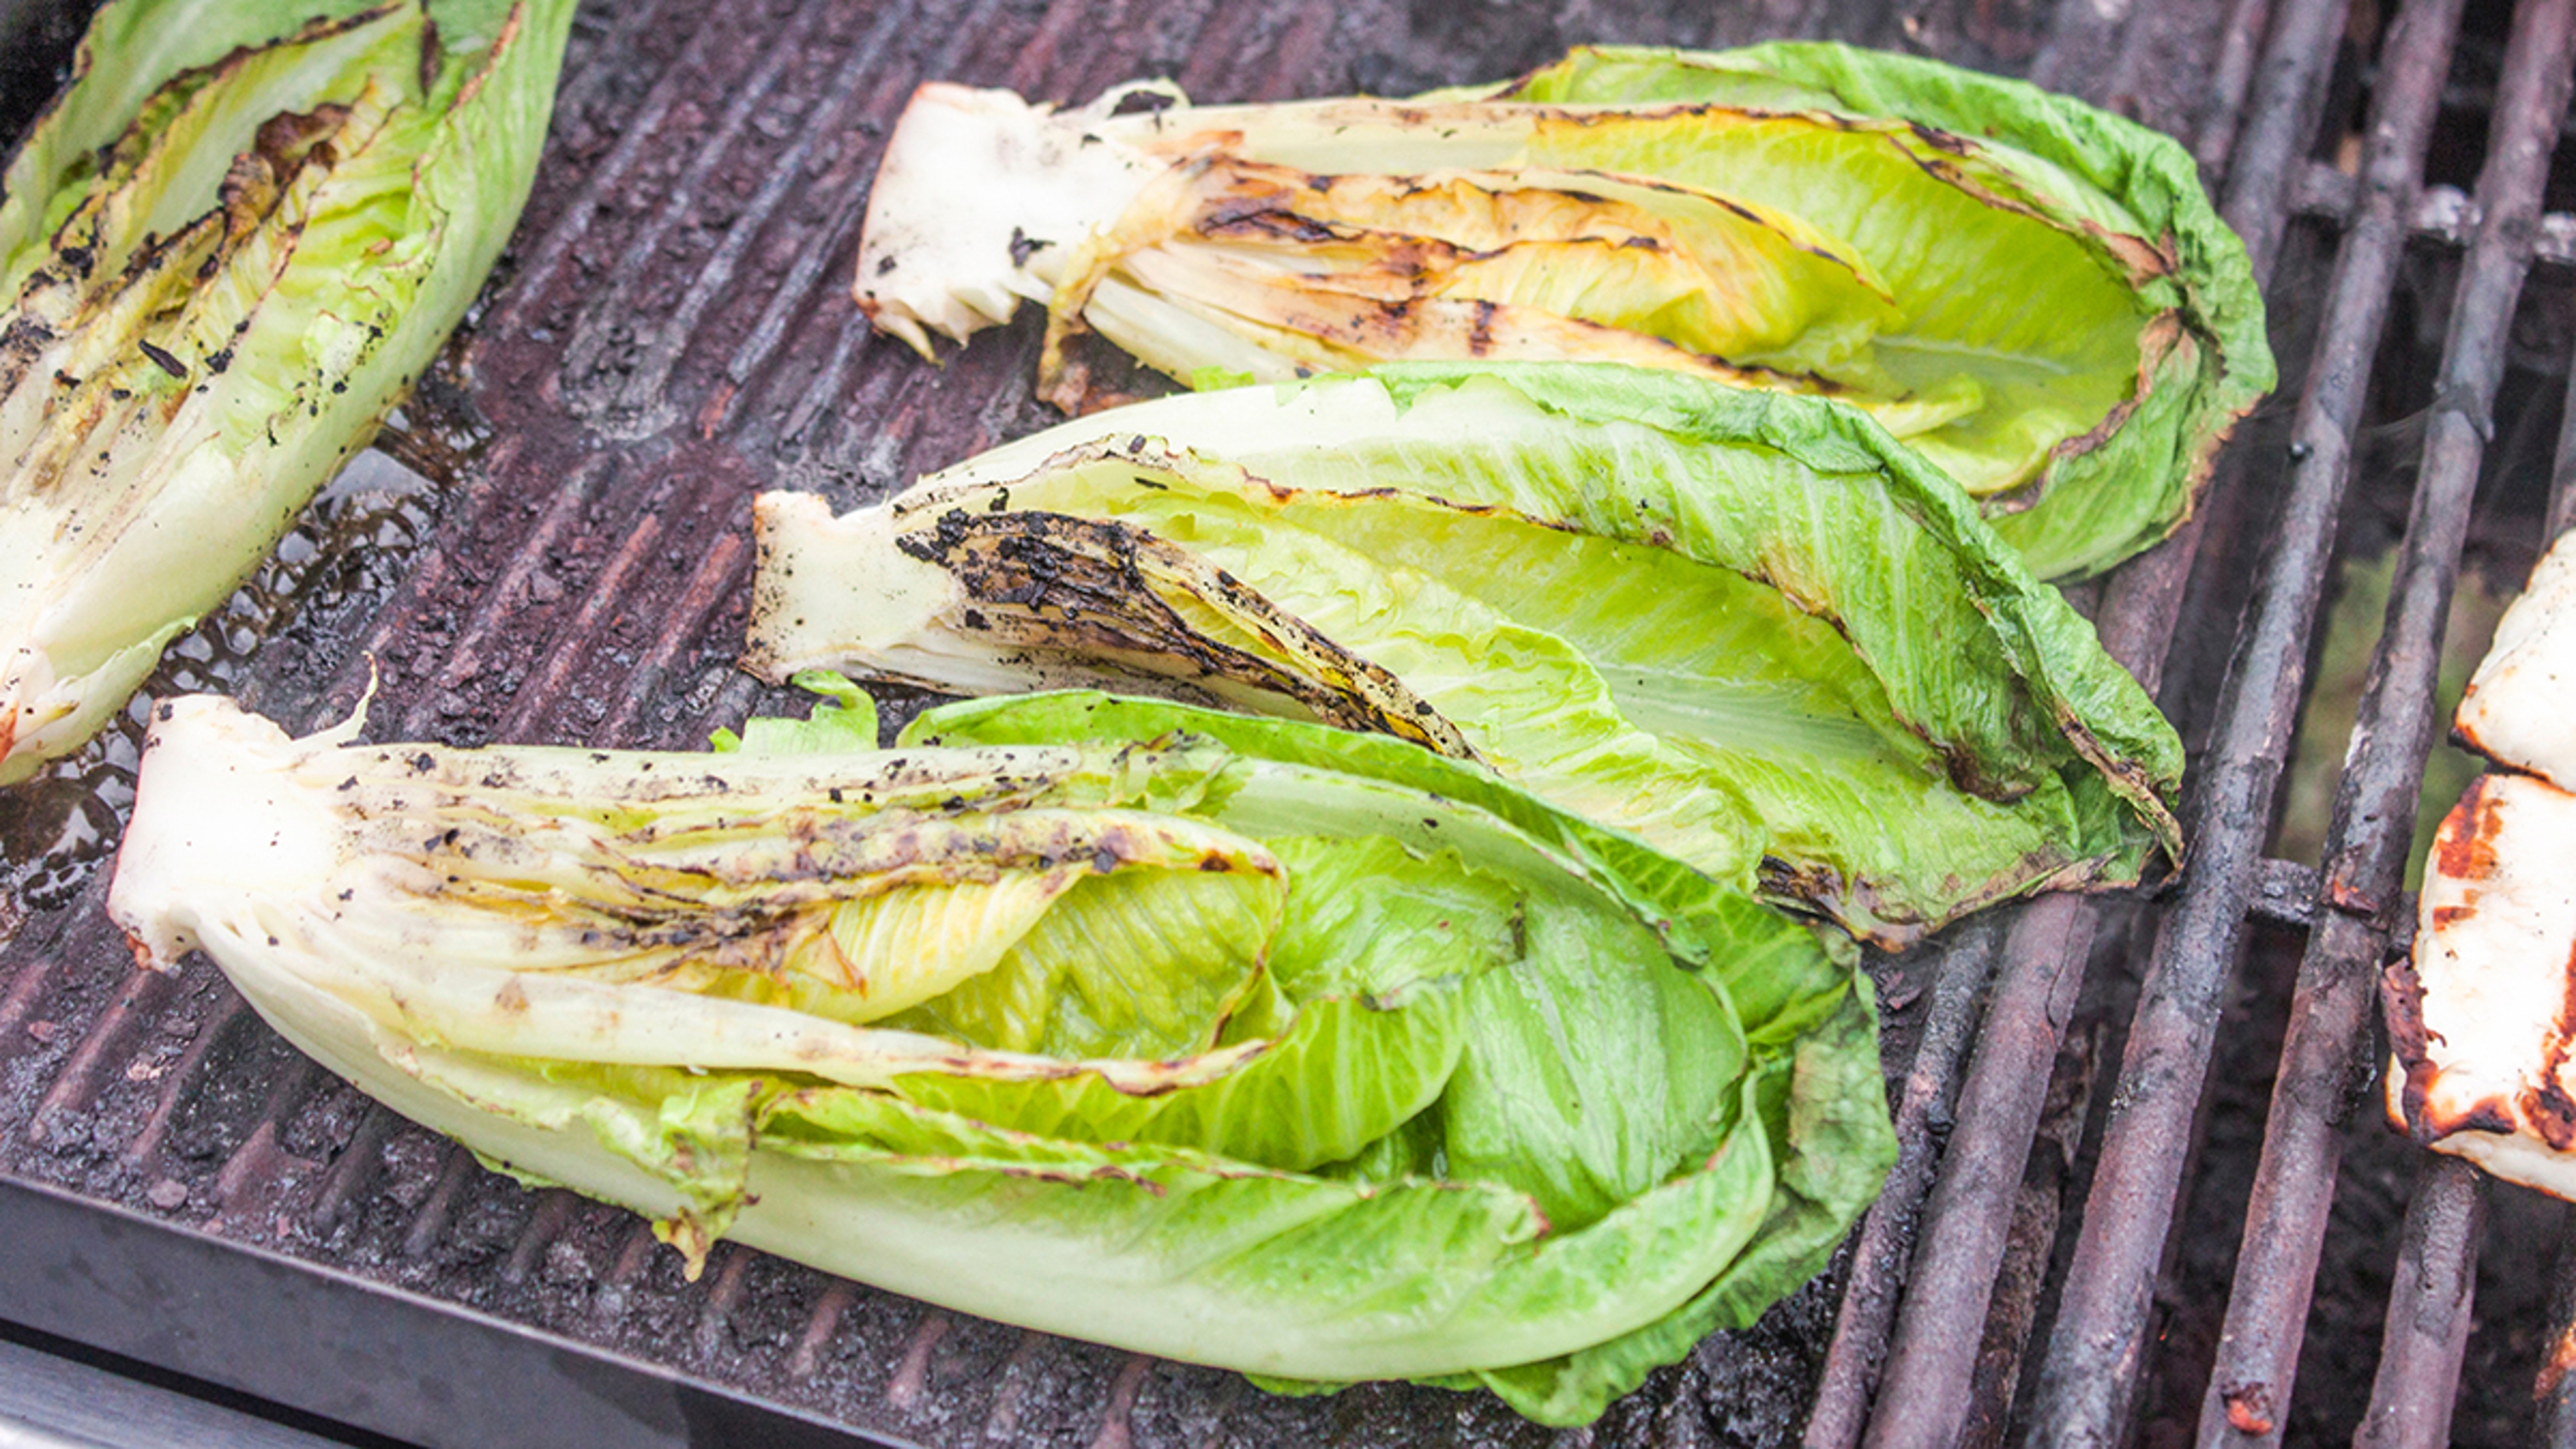
No recipe here, but you can grill whole kale leaves or heads of tender lettuces (bibb, romaine, etc.) cut in half and lightly seasoned. Radicchio is great on the grill, too, as are endives.
You can take any combination of the grilled lettuces and make a punchy anchovy vinaigrette or garlicky Caesar dressing. If you really want to do a next-level salad, split whole cloves of garlic and brush them with oil, wrap in foil, and leave them to the side of the grill for an hour, and then squeeze them onto the grilled lettuces.
How to grill fruit
Grilling fruit is an interesting way to consume summer's bounty, although it can be challenging. The key, like with most everything else on this list, is preparing a hot and clean grill to ensure the fruit does not stick.
For direct cooking, you want to select firmer fruits, such as pears or plums, and pat the excess liquid off them.
For softer fruits, such as berries and tomatoes (yes, tomatoes are fruit), use a grilling basket or perforated pan to achieve a smoky grilled flavor without getting grill marks.
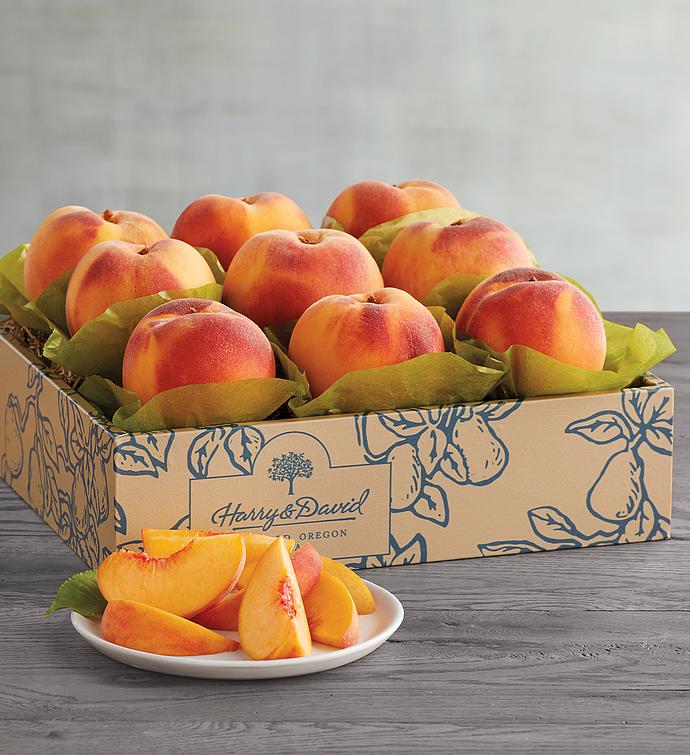
Peaches
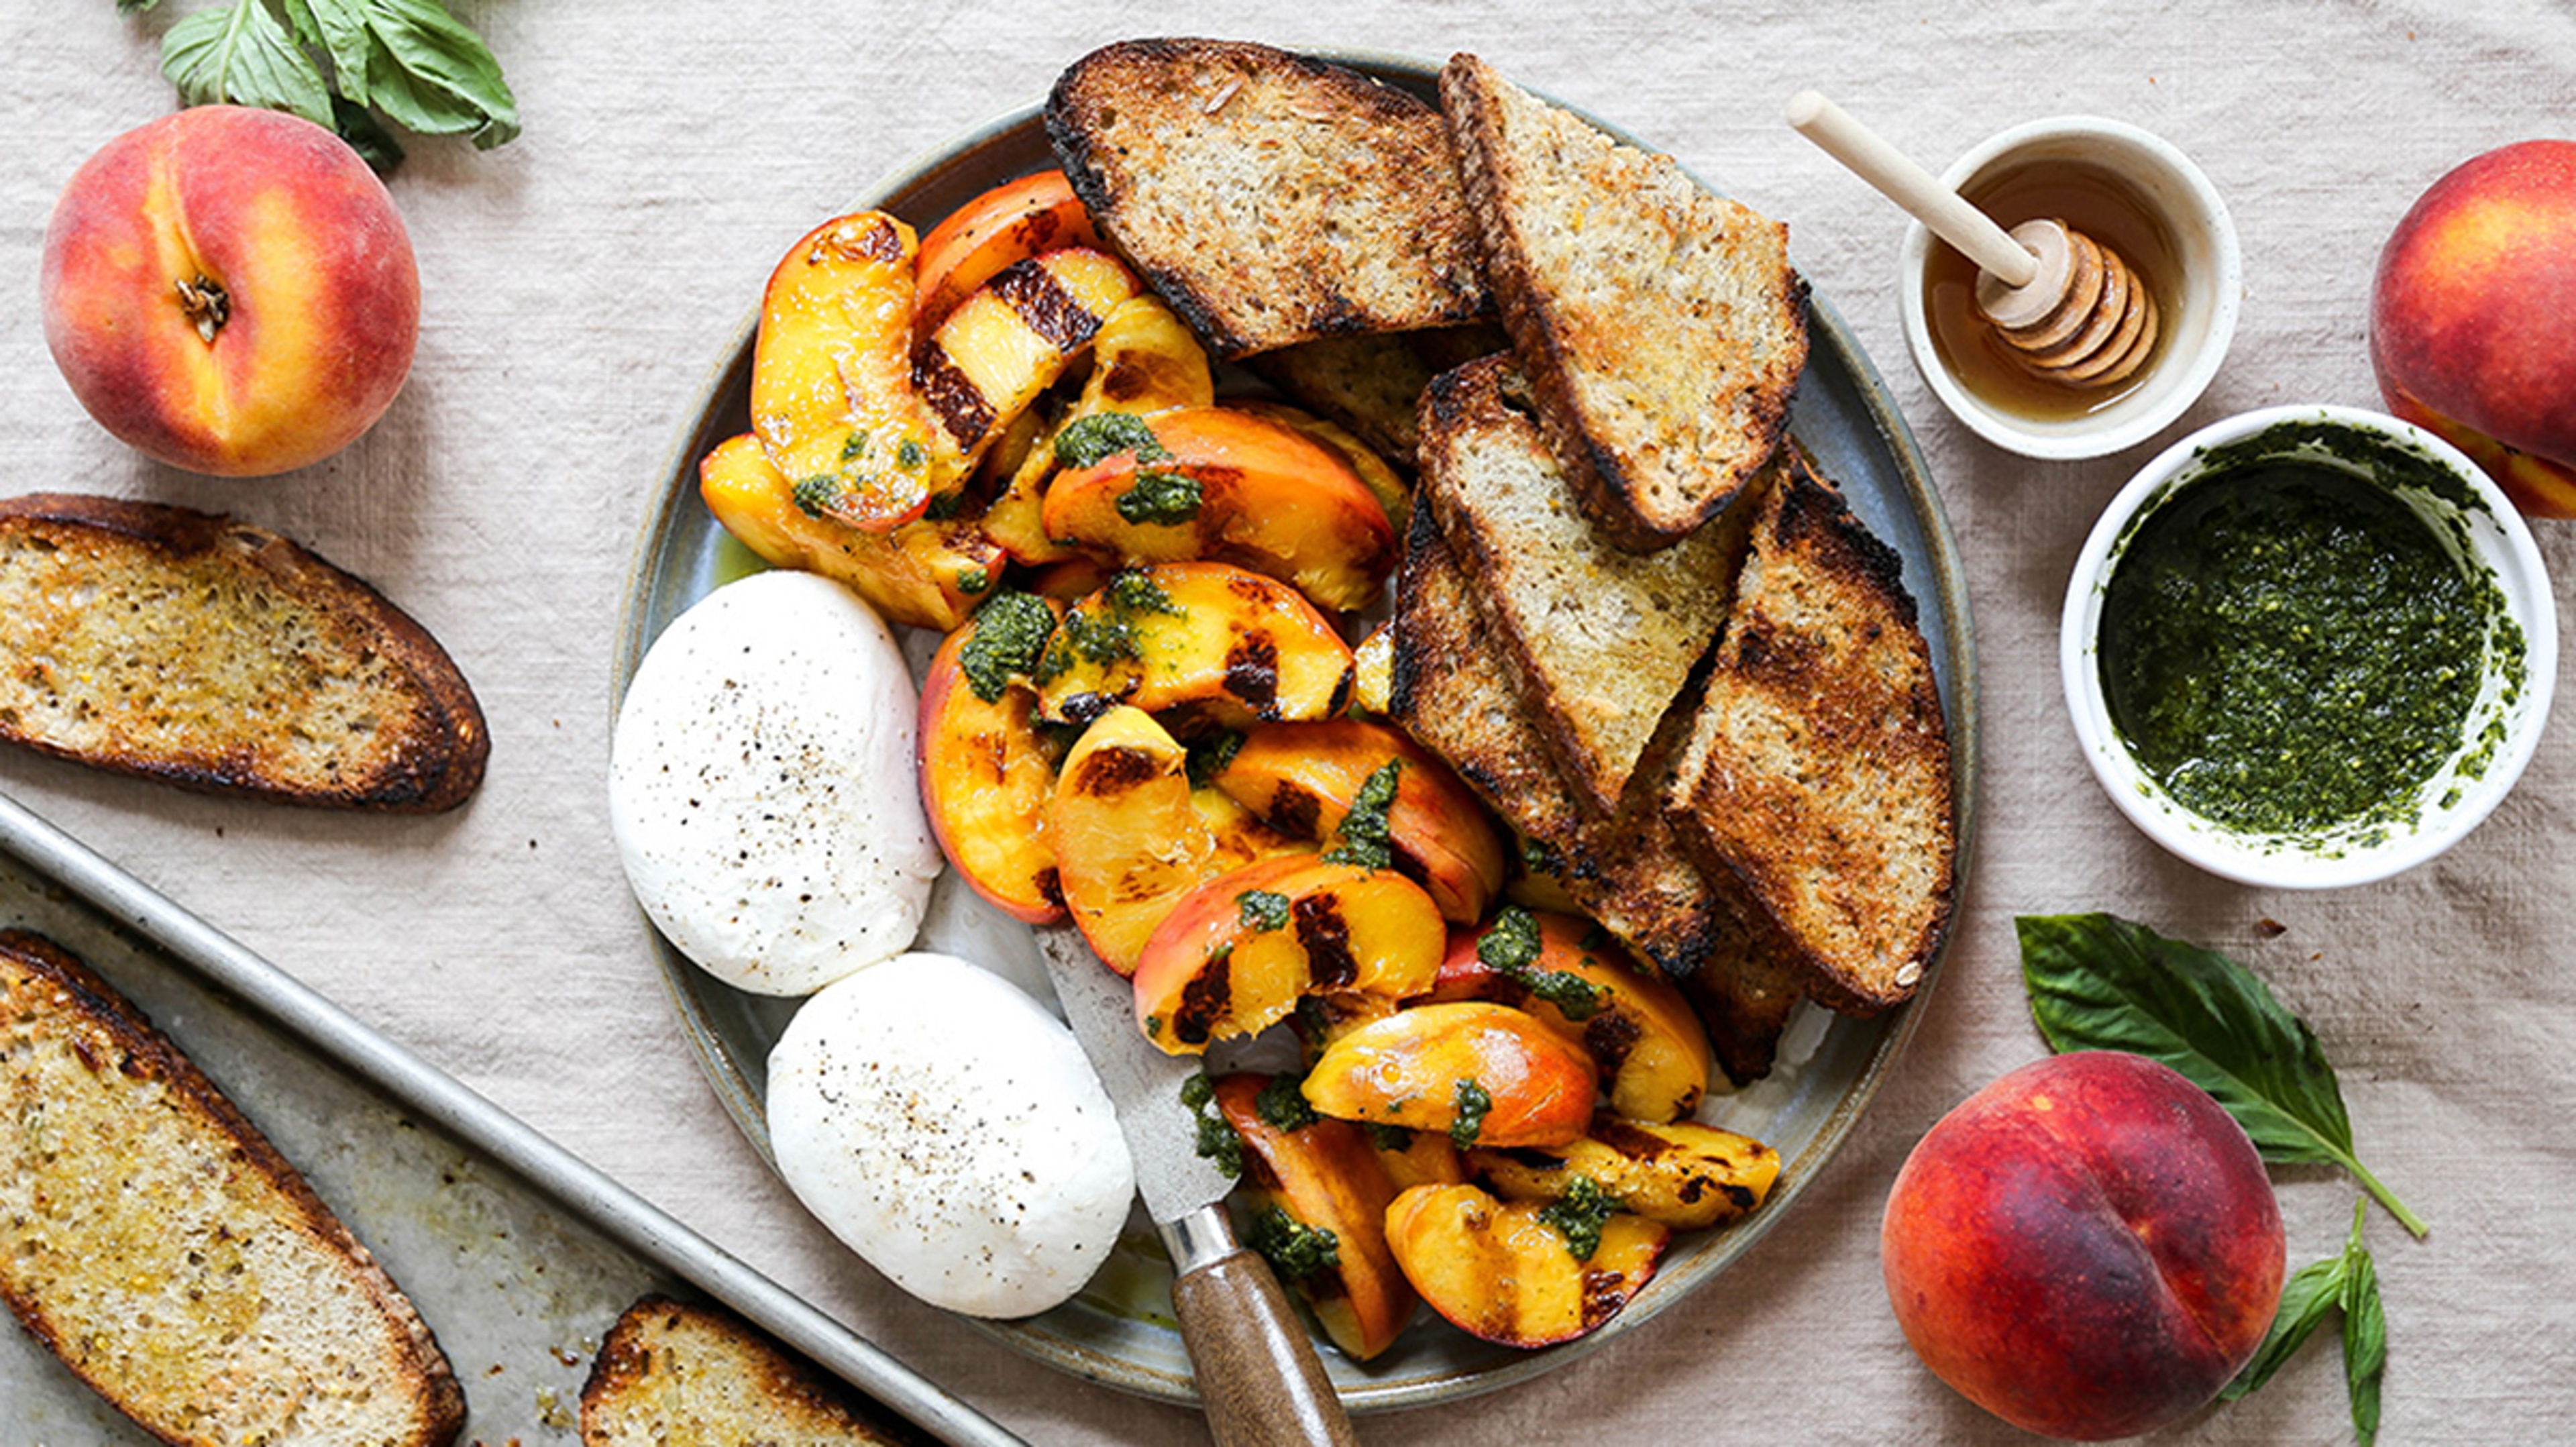
Peaches are one of my favorite fruits to grill because of their versatility, as they can be used with sweet or savory preparations. For a sweet preparation, cut the peaches in half, toss them in granulated sugar to lightly coat, and then cook them right on the preheated grill. The sugar will caramelize and leave nice grill marks on the fruit. These can be served with lemon zest, slices of grilled (yes, grilled!) pound cake, and soft whipped cream.
For a savory preparation, toss the peach halves with salt, pepper, and olive oil, and cook to achieve grill marks. These are great served with some fresh burrata cheese, grilled bread, and arugula salad, or on a pizza with speck ham and mozzarella cheese.


AUTHOR

Chef Bradford Thompson's culinary palate was formed by his summers spent lobster trapping and picking fresh blueberries with his grandmother on the coast of Maine. The classically trained chef has worked in the kitchens of such culinary luminaries as Vincent Guerithault, Alessandro Stratta, and Daniel Boulud. After being named a Best New Chef by Food & Wine in 2004, he won a James Beard Award as the Executive Chef at Mary Elaine's in 2006. Since leaving the back of the house, Thompson, a Level 1 Certified Sommelier, founded Bellyfull Hospitality, a full service culinary/hospitality consulting company. He's also an instructor at the ICC Food Business Program and the ICE Restaurant Management program, where he teaches and inspires the next generation of restaurateurs. A diehard sports fan, Thompson can often be found in the MetLife Stadium parking lot, tailgating and cheering on his beloved New York Giants, whom he has cooked for several times.